怎么使用Vue+Canvas制作简易的水印添加器小工具
导读:本文共5522字符,通常情况下阅读需要18分钟。同时您也可以点击右侧朗读,来听本文内容。按键盘←(左) →(右) 方向键可以翻页。
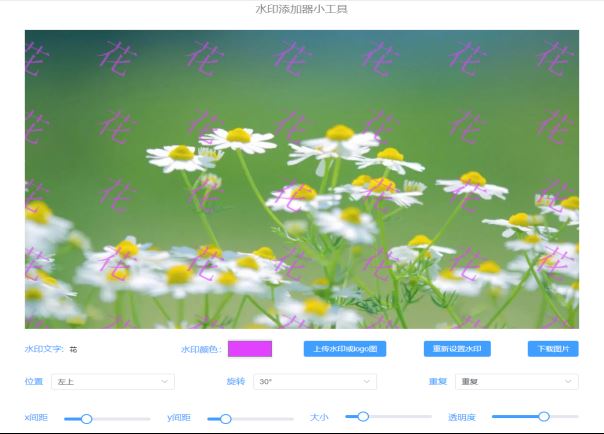
摘要: 效果展示实现功能自定义水印的文字及颜色,水印的位置,旋转角度,大小,透明度,是否重复显示,以及选择为重复时可以选择文字之间的水平间距和垂直间距,在设置为合适的图片时点击下载按钮即可下载得到完成图.如果觉得效果不好也可以点击重置按钮瞬间清屏.同时还支持logo图水印。实现思路1.首先要引入vue.js以及elementui组件和样式如下:<!--引入样式--... ...
目录
(为您整理了一些要点),点击可以直达。效果展示
实现功能
自定义水印的文字及颜色,水印的位置,旋转角度,大小,透明度,是否重复显示,以及选择为重复时可以选择文字之间的水平间距和垂直间距,在设置为合适的图片时点击下载按钮即可下载得到完成图.如果觉得效果不好也可以点击重置按钮瞬间清屏.同时还支持logo图水印。
实现思路
1.首先要引入vue.js以及elementui组件和样式如下:
<!--引入样式--><linkrel="stylesheet"href="https://unpkg.com/element-plus/dist/index.css"rel="externalnofollow"/><!--引入Vue--><scriptsrc="https://unpkg.com/vue@next"></script><!--引入组件库--><scriptsrc="https://unpkg.com/element-plus"></script>
2.html代码如下:
<divid="app"><divclass="home"><divclass="mycontainer"><canvasid="canvasImg"@click="uploadfile()"></canvas><divclass="selectboxbox"v-show="imgnode"><div><inputtype="text"class="canvastext"@input="addtext"v-model="inputval"placeholder="请输入水印文字"/>水印颜色:<inputtype="color"class="colorselect"placeholder=""v-model="color"@change="loop">取色器:<inputtype="color"class="colorselect"><ulclass="btns"><liclass="smallprant"><button@click="addlogo">上传水印或logo图</button></li><li><button@click="unset">重新设置水印</button></li></ul></div><divclass="box"><ulclass="centerselect"><li>位置<el-selectv-model="position"placeholder="请选择"@change="loop"><el-optionlabel="中心"value="中心"></el-option><el-optionlabel="左上"value="左上"></el-option><el-optionlabel="上"value="上"></el-option><el-optionlabel="右上"value="右上"></el-option><el-optionlabel="右"value="右"></el-option><el-optionlabel="右下"value="右下"></el-option><el-optionlabel="下"value="下"></el-option><el-optionlabel="左下"value="左下"></el-option><el-optionlabel="左"value="左"></el-option></el-select></li><liclass="rotate">旋转<el-selectv-model="rotate"placeholder="请选择"@change="loop"><el-optionlabel="0°":value="0"></el-option><el-optionlabel="15°":value="15"></el-option><el-optionlabel="30°":value="30"></el-option><el-optionlabel="45°":value="45"></el-option><el-optionlabel="60°":value="60"></el-option></el-select></li><li>重复<el-selectv-model="repetition"placeholder="请选择"@change="loop"><el-optionlabel="不重复":value="false"></el-option><el-optionlabel="重复":value="true"></el-option></el-select></li></ul></div><divclass="box"><span>x间距</span><divclass="block"><el-sliderv-model="value0":step="1":max="slidermax"@input="loop"></el-slider></div><span>y间距</span><divclass="block"><el-sliderv-model="value1":step="1":max="slidermax"@input="loop"></el-slider></div><span>大小</span><divclass="block"><el-sliderv-model="value2":step="1":max="slidermax"@input="loop"></el-slider></div><span>透明度</span><divclass="block"><el-sliderv-model="value3":step="0.1":max='1'@input="loop"></el-slider></div></div></div><el-buttonv-show="imgnode"@click="saveimg">保存图片到本地</el-button></div></div></div>
3.点击按钮后需要选择上传水印的图片方法如下:
整体思路如下:
loop(){this.clear()//1.清空画布if(this.imgnode)this.drawimg(this.imgnode)//2.判断是否上传了图片,有就绘制图片if(this.inputval)this.drawtext(this.inputval)//3.判断输入框是否有文字,有绘制文字if(this.logo)this.drawlogo(this.logo)//4.判断是否添加logo图片,有就绘制logo},下面先介绍一下项目中运行到的一些函数方法:
(1)绘制背景函数,先拿到页面中cavans元素,运用drawImage()画出背景。
//绘制图片drawimg(url){letcanvas=document.getElementById('canvasImg')letcontext=canvas.getContext('2d')context.drawImage(url,0,0)},(2) 绘制字体水印,同理先拿到canvas元素, 运用到的方法:
context.font:设置字体的大小。
context.fillStyle:设置字体的类型颜色。
repetition:判断是否重复 。
globalAlpha:设置字体的透明度。
rotate:旋转角度。
translate:偏移位置。
setposition()函数:设置水印的位置,主要用到了canvas.width和canvas.height。
中心点位置: strarr = [canvas.width / 2, canvas.height / 2]。
左上角位置: strarr = [0, 0]。
通过改变x,y将元素放置在画布各个位置,绘制logo水印同理。
//绘制字体水印drawtext(value){letcanvas=document.getElementById('canvasImg')//获取cavansletcontext=canvas.getContext('2d')letstrarr=this.setposition()context.font=this.value2+"px'宋体'"context.fillStyle=this.colorif(!this.repetition){//是否想要文字重复,默认不重复context.save()context.globalAlpha=this.value3context.translate(strarr[0],strarr[1])context.rotate((Math.PI/180)*(this.rotate*1))context.translate(-strarr[0],-strarr[1])context.fillText(value,strarr[0],strarr[1]+this.value2)context.restore()}else{for(leti=0;i<canvas.width;i+=(this.value2*this.inputval.length+this.value0)){for(letj=0;j<canvas.height;j+=(this.value2+this.value1)){context.save()context.globalAlpha=this.value3context.translate(strarr[0]+i,strarr[1]+j)context.rotate((Math.PI/180)*(this.rotate*1))context.translate(-strarr[0]-i,-strarr[1]-j)context.fillText(value,(strarr[0])+i,(strarr[1])+j+this.value2)context.restore()}}}},(3)清屏函数:如果在绘制过程中,对绘制的效果不满意,想要重新绘制,就涉及到清屏操作,这里我是将输入的文字(inputval)和选中的水印(logo)设置为空再重新绘制, 代码如下:
//重新设置unset(){//输入的文字this.inputval=null//选中的水印this.logo=nullthis.loop()},(4)保存图片代码:绘制完成后就是保存图片代码,这里我是先创建了一个url元素用来存放下载的位置,文件名用new Date().getTime()+‘.png’ 这种形式来避免文件名重复,当我们下载完成之后创建的url并没有被释放,此时就需要使用 URL.revokeObjectURL()方法将内存释放掉,此处做了一个延迟,让url内存5秒后被释放。
//保存图片到本地saveimg(){letcanvas=document.getElementById('canvasImg')canvas.toBlob(blob=>{leturl=URL.createObjectURL(blob)letsave_link=document.createElement('a');save_link.href=url;save_link.download=newDate().getTime()+'.png';letevent=document.createEvent('MouseEvents');event.initEvent("click",true,false);save_link.dispatchEvent(event);setTimeout(()=>{URL.revokeObjectURL(url)},5000);})},(5)功能函数:使用这种方法创建元素可以节约资源避免浪费。
//----功能函数----loadImg(url){constimg=document.createElement('img')img.src=urlreturnimg},css代码如下:
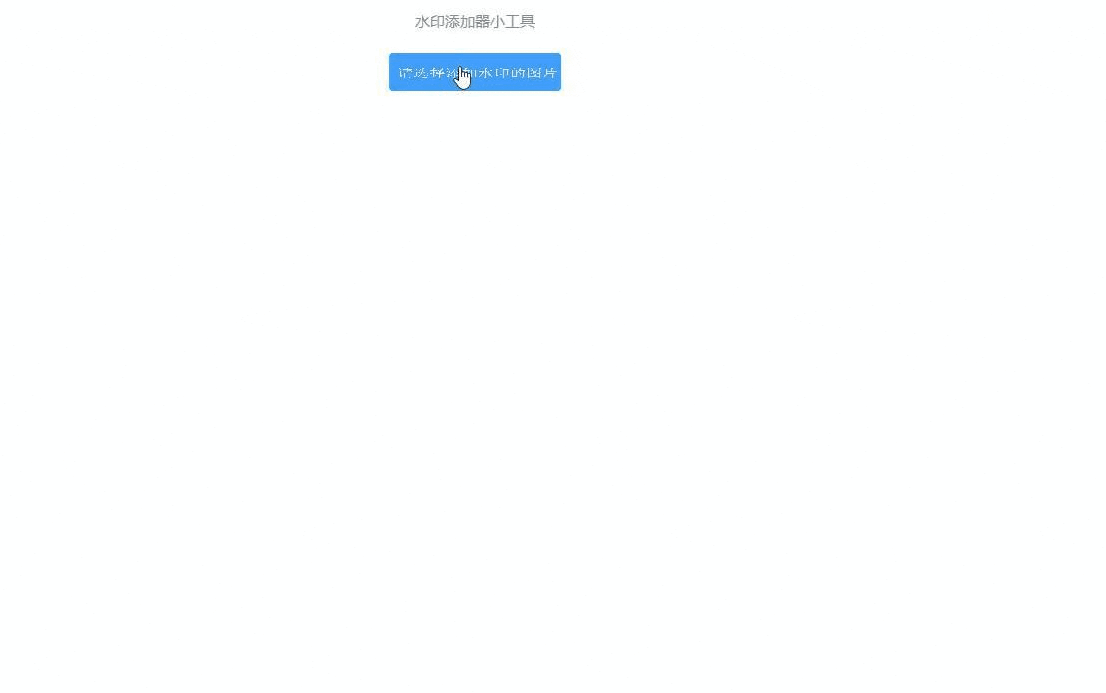
*{margin:0;padding:0;}.title{font-size:20px;margin:30px;color:#888;}canvas{background-color:#ccc;max-width:960px;}.cavansimg{width:230px;height:50px;background-color:#409EFF;border-radius:5px;cursor:pointer;}.mycontainer{width:960px;text-align:center;margin:0auto;padding-bottom:20px;}.textstyle{width:100%;display:flex;justify-content:space-between;align-items:center;}.selectbox{display:flex;margin-top:20px;justify-content:space-between;}.box{width:100%;display:flex;justify-content:space-between;align-items:center;flex:1;color:#409EFF;}li{list-style:none;}.btns{display:flex;justify-content:space-between;margin-left:20px;}.btnsbutton{width:120px;height:50px;margin-right:30px;border-radius:10px;background-color:#409EFF;color:#fff;outline:none;border:none;}.colorselect{border-radius:5px;width:80px;height:40px;outline:none;border:none;}.canvastext{height:40px;width:150px;border-radius:5px;text-indent:10px;border:1pxsolid#409EFF;border:none;outline:none;}.centerselect{margin:200;display:flex;justify-content:space-between;color:#409EFF;}.centerselectli{height:50px;line-height:50px;}span{display:inline-block;}.smallprant{position:relative;}html,body{user-select:none;}.block{width:150px;}初始界面:
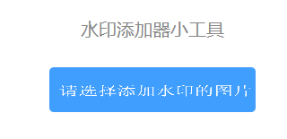
点击按钮选择图片后:
</div> <div class="zixun-tj-product adv-bottom"></div> </div> </div> <div class="prve-next-news">怎么使用Vue+Canvas制作简易的水印添加器小工具的详细内容,希望对您有所帮助,信息来源于网络。