Android中怎么利用Layout实现用户界面
导读:本文共4087字符,通常情况下阅读需要14分钟。同时您也可以点击右侧朗读,来听本文内容。按键盘←(左) →(右) 方向键可以翻页。
摘要: 1.帧布局 FrameLayout:FrameLayout是最简单的布局对象。在它里面的的所有显示对象都将固定在屏幕的左上角,不能指定位置,后一个会直接覆盖在前一个之上显示:如图所示第二个TextView直接覆盖在了第一个TextView上面。2.线性布局 LinearLayout:LinearLayout是最常用的布局之一,也是RadioGroup, TabW... ...
目录
(为您整理了一些要点),点击可以直达。1.帧布局 FrameLayout:
FrameLayout是最简单的布局对象。在它里面的的所有显示对象都将固定在屏幕的左上角,不能指定位置,后一个会直接覆盖在前一个之上显示:
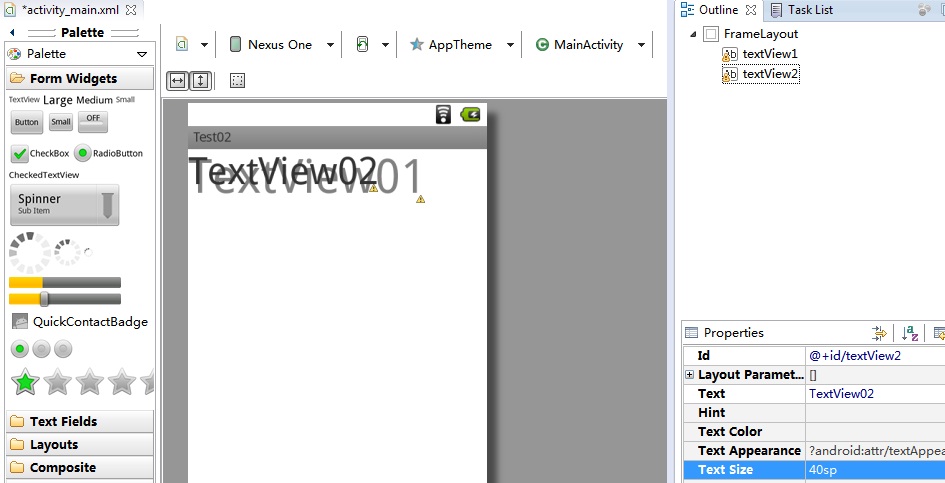
如图所示第二个TextView直接覆盖在了第一个TextView上面。
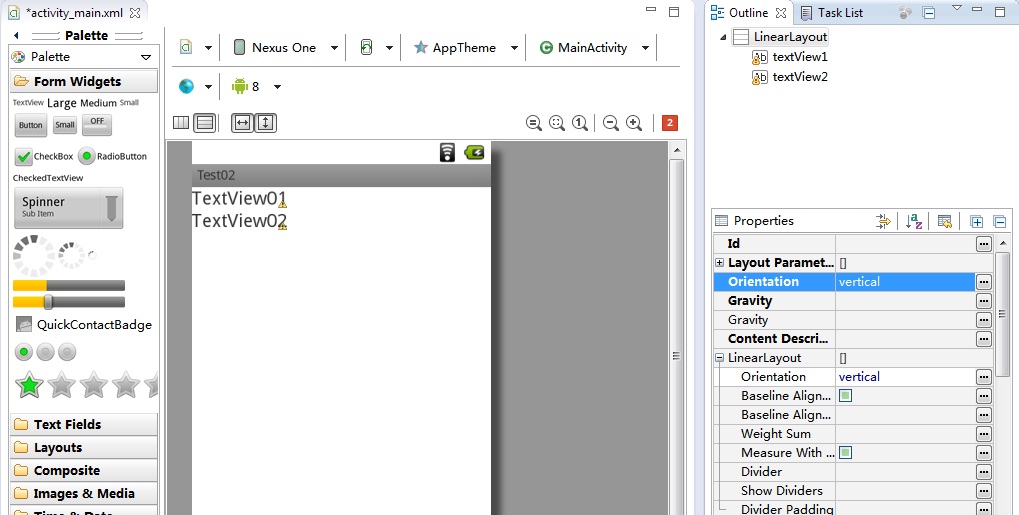
2.线性布局 LinearLayout:
LinearLayout是最常用的布局之一,也是RadioGroup, TabWidget, TableLayout, TableRow, ZoomControls类的父类,它里面所有显示的对象都以垂直或水平的方式排列(通过设置LinearLayout的Orentation属性来设置排列方式):
3.相对布局 RelativeLayout:
RelativeLayout 允许子元素指定它们相对于其父元素或兄弟元素的位置,是实际布局中最常用的布局方式之一。它灵活性大、属性也多,操作难度比较大,属性之间产生冲突的的可能性也大,使用相对布局时需要多做测试。

<RelativeLayoutxmlns:android="http://schemas.android.com/apk/res/android"android:layout_width="fill_parent"android:layout_height="fill_parent"><ImageViewandroid:id="@+id/imageView1"android:layout_width="wrap_content"android:layout_height="wrap_content"android:layout_alignParentTop="true"android:layout_centerHorizontal="true"android:layout_marginTop="20dp"android:src="@drawable/test"/><TextViewandroid:id="@+id/textView1"android:layout_width="wrap_content"android:layout_height="wrap_content"android:layout_below="@id/imageView1"android:layout_centerHorizontal="true"android:text="在imageView1下方"android:textSize="15sp"/><TextViewandroid:id="@+id/textView2"android:layout_width="wrap_content"android:layout_height="wrap_content"android:layout_below="@id/textView1"android:layout_centerHorizontal="true"android:text="在testView1下方"android:textSize="15sp"/></RelativeLayout>
RelativeLayout用到的一些重要的属性:
第一类:属性值为true或false
android:layout_centerHrizontal -------------------------------水平居中
android:layout_centerVertical ---------------------------------垂直居中
android:layout_centerInparent --------------------------------相对于父元素完全居中
android:layout_alignParentBottom ----------------------------贴紧父元素的下边缘
android:layout_alignParentLeft --------------------------------贴紧父元素的左边缘
android:layout_alignParentRight ------------------------------贴紧父元素的右边缘
android:layout_alignParentTop --------------------------------贴紧父元素的上边缘
android:layout_alignWithParentIfMissing ----------------------如果对应的兄弟元素找不到的话就以父元素做参照物
第二类:属性值必须为id的引用名“@id/id-name”
android:layout_below -----------------------------------------在某元素的下方
android:layout_above ----------------------------------------在某元素的的上方
android:layout_toLeftOf --------------------------------------在某元素的左边
android:layout_toRightOf -------------------------------------在某元素的右边
android:layout_alignTop --------------------------------------本元素的上边缘和某元素的的上边缘对齐
android:layout_alignLeft --------------------------------------本元素的左边缘和某元素的的左边缘对齐
android:layout_alignBottom ----------------------------------本元素的下边缘和某元素的的下边缘对齐
android:layout_alignRight -------------------------------------本元素的右边缘和某元素的的右边缘对齐
第三类:属性值为具体的像素值,如30dip,40px
android:layout_marginBottom --------------------------------离某元素底边缘的距离
android:layout_marginLeft ------------------------------------离某元素左边缘的距离
android:layout_marginRight ----------------------------------离某元素右边缘的距离
android:layout_marginTop ------------------------------------离某元素上边缘的距离
4.表格布局 TableLayout:
TableLayout以行列的形式管理子元素,每一行是一个TableRow布局对象,当然也可以是普通的View对象,TableRow离每放一个元素就是一列,总列数由列数最多的那一行决定。
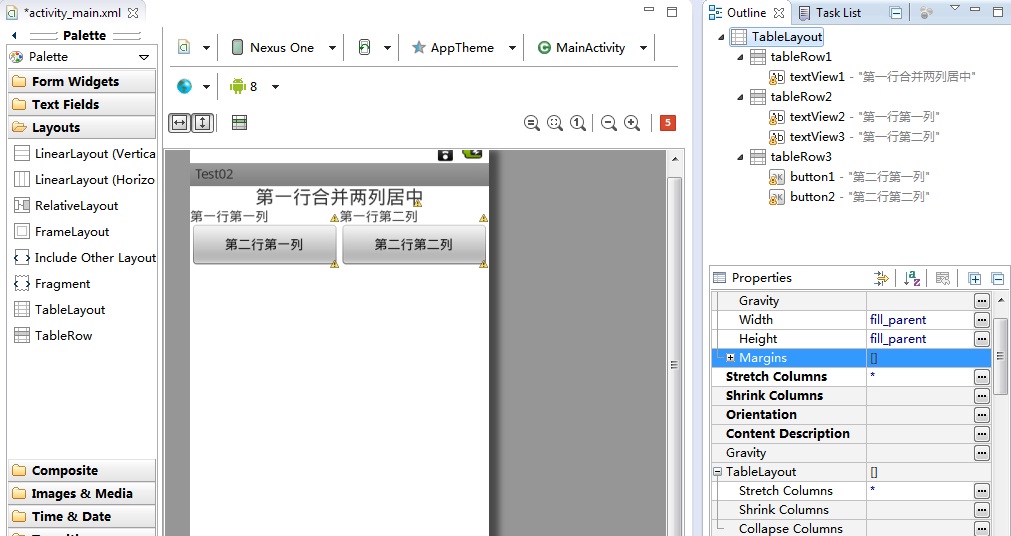
<TableLayoutxmlns:android="http://schemas.android.com/apk/res/android"android:layout_width="fill_parent"android:layout_height="fill_parent"android:stretchColumns="*"><TableRowandroid:id="@+id/tableRow1"android:layout_width="fill_parent"android:layout_height="fill_parent"><TextViewandroid:id="@+id/textView1"android:layout_width="wrap_content"android:layout_height="wrap_content"android:layout_gravity="center"android:layout_span="2"android:text="第一行合并两列居中"android:textSize="20sp"/></TableRow><TableRowandroid:id="@+id/tableRow2"android:layout_width="wrap_content"android:layout_height="wrap_content"><TextViewandroid:id="@+id/textView2"android:layout_width="wrap_content"android:layout_height="wrap_content"android:text="第一行第一列"/><TextViewandroid:id="@+id/textView3"android:layout_width="wrap_content"android:layout_height="wrap_content"android:text="第一行第二列"/></TableRow><TableRowandroid:id="@+id/tableRow3"android:layout_width="wrap_content"android:layout_height="wrap_content"><Buttonandroid:id="@+id/button1"android:layout_width="wrap_content"android:layout_height="wrap_content"android:text="第二行第一列"/><Buttonandroid:id="@+id/button2"android:layout_width="wrap_content"android:layout_height="wrap_content"android:text="第二行第二列"/></TableRow></TableLayout>
android:layout_span="2"是设置该TextView占据2列(我在界面设计器里面没找到TextView的Span属性,所以是在xml文件里面直接添加的),android:stretchColumns="*"是设置该TableLayout的所有列都自动扩展,如果不设置自动扩展每行列宽会根据显示的内容改变。
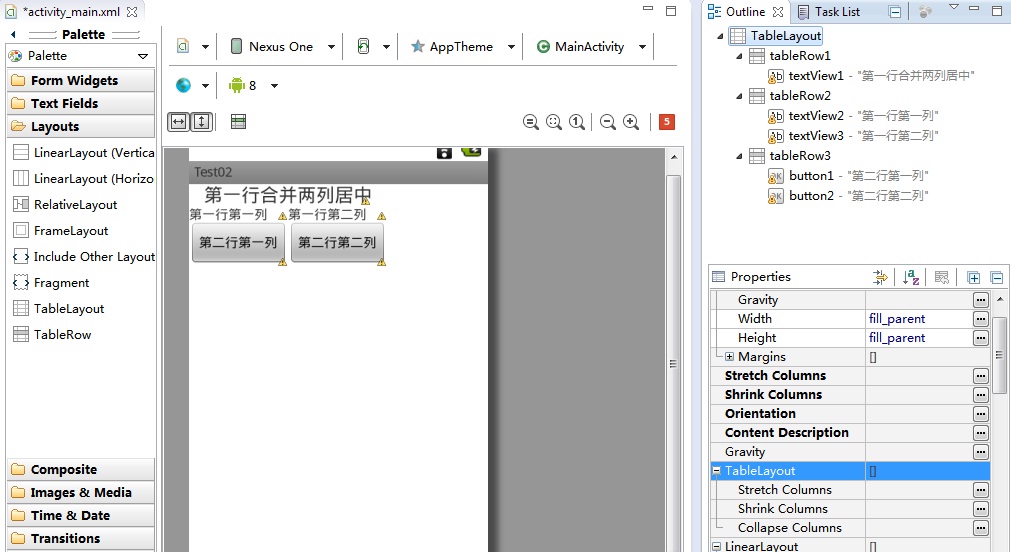
TableLayout的几个重要属性:
collapseColumns -----------------------------设置隐藏那些列,列ID从0开始,多个列的话用”,”分隔
stretchColumns ------------------------------设置自动伸展那些列,列ID从0开始,多个列的话用”,”分隔
shrinkColumns -------------------------------设置自动收缩那些列,列ID从0开始,多个列的话用”,”分隔
</div> <div class="zixun-tj-product adv-bottom"></div> </div> </div> <div class="prve-next-news">Android中怎么利用Layout实现用户界面的详细内容,希望对您有所帮助,信息来源于网络。