SpringBoot中如何使用Thymeleaf操作
导读:本文共1674字符,通常情况下阅读需要6分钟。同时您也可以点击右侧朗读,来听本文内容。按键盘←(左) →(右) 方向键可以翻页。
摘要: 前言 Thymeleaf是一个适用于Web和独立环境的现代服务器端Java模板引擎。 Thymeleaf的主要目标是为您的开发工作流程带来优雅的自然模板 - 可以在浏览器中正确显示的HTML,也可以用作静态原型,从而在开发团队中实现更强大的协作。 通过Spring Framework模块,与您喜欢的工具的大量集成,以及插入您自己... ...
目录
(为您整理了一些要点),点击可以直达。前言
Thymeleaf是一个适用于Web和独立环境的现代服务器端Java模板引擎。
Thymeleaf的主要目标是为您的开发工作流程带来优雅的自然模板 - 可以在浏览器中正确显示的HTML,也可以用作静态原型,从而在开发团队中实现更强大的协作。
通过Spring Framework模块,与您喜欢的工具的大量集成,以及插入您自己的功能的能力,Thymeleaf是现代HTML5 JVM Web开发的理想选择
Thymeleaf与Velocity或FreeMarker等其他模板引擎相比如何?
Velocity 和 FreeMarker 都是非常棒的软件,但是它们处理模板问题的原理与Thymeleaf 完全不同。
Thymeleaf 非常强调自然模板化——允许模板成为工作原型,而其他两个模板不允许这样做——它的语法试图(可以说)更干净,更符合当前 web开发的趋势。另外,从架构的角度来看,Velocity 和 FreeMarker 都是顺序文本处理器,而 Thymeleaf 是基于标记解析技术的。这允许 Thymeleaf 利用特定于基于标记的环境的有趣特性,特别是web。
SpringBoot使用Thymeleaf 操作步骤
第一步是引入Thymeleaf starter依赖,具体代码如下:
<!--thymeleaf相关依赖--><dependency><groupId>org.springframework.boot</groupId><artifactId>spring-boot-starter-thymeleaf</artifactId></dependency>
第二步是在 application.properties 添加 Thymeleaf 相关配置,具体配置如下:
server.port=8090server.servlet.context-path=/sbe#关闭Thymeleaf的缓存开发过程中无需重启spring.thymeleaf.cache=false#设置thymeleaf页面的编码spring.thymeleaf.encoding=UTF-8spring.thymeleaf.mode=HTML5#设置thymeleaf页面的后缀spring.thymeleaf.suffix=.html#设置thymeleaf页面的存储路径spring.thymeleaf.prefix=classpath:/templates/
第三步是编写访问 Thymeleaf 页面 Controller。
@Controller@RequestMapping("/hello")publicclassThymeleafHelloWrodController{@RequestMapping("/thymeleaf")publicStringhelloThymeleaf(Modelmodel){model.addAttribute("hello","helloThymeleaf!");return"hello/index";}}Thymeleaf 页面代码如下:
<!DOCTYPEhtml><htmlxmlns:th="http://www.thymeleaf.org"><head><metacharset="UTF-8"><title>Inserttitlehere</title></head><body><pth:text="${hello}">hello</p></body></html>测试
在游览器输入访问 Thymeleaf 页面的 Controller 的 URL:http://localhost:8090/sbe/hello/thymeleaf 进行测试,测试结果如下: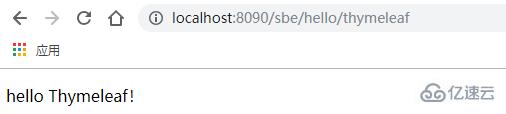
</div> <div class="zixun-tj-product adv-bottom"></div> </div> </div> <div class="prve-next-news">SpringBoot中如何使用Thymeleaf操作的详细内容,希望对您有所帮助,信息来源于网络。