Python怎么利用LyScript插件实现批量打开关闭进程
导读:本文共2817.5字符,通常情况下阅读需要9分钟。同时您也可以点击右侧朗读,来听本文内容。按键盘←(左) →(右) 方向键可以翻页。
摘要: LyScript是一款x64dbg主动化操控插件,经过Python操控X64dbg,完成了远程动态调试,解决了逆向工作者剖析漏洞,寻觅指令片段,原生脚本不行强壮的问题,经过与Python相结合使用Python语法的灵活性以及丰富的第三方库,进步剖析功率,完成主动化剖析代码。python包请装置与插件一致的版别,在cmd命令行下履行pip命令即可装置。装置Pyth... ...
目录
(为您整理了一些要点),点击可以直达。LyScript是一款x64dbg主动化操控插件,经过Python操控X64dbg,完成了远程动态调试,解决了逆向工作者剖析漏洞,寻觅指令片段,原生脚本不行强壮的问题,经过与Python相结合使用Python语法的灵活性以及丰富的第三方库,进步剖析功率,完成主动化剖析代码。
python包请装置与插件一致的版别,在cmd命令行下履行pip命令即可装置。
装置Python包:pipinstallLyScript32或者pipinstallLyScript64
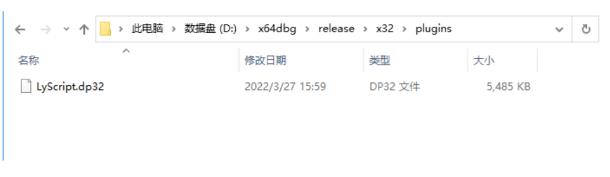
其次你需求手动下载对应x64dbg版别的驱动文件,并放入指定目录下。
插件下载好以后,请将该插件复制到x64dbg目录下的plugins目录下,程序运转后会主动加载插件文件。
当插件加载成功后,会在日志方位看到具体的绑定信息以及输出调试,该插件并不会在插件栏显示。
假如需求远程调试,则只需求在初始化MyDebug()类是传入对端IP地址即可,假如不填写参数则默认使用127.0.0.1地址,请保证对端放行了6589端口,不然无法衔接。
运转x64dbg程序并手动载入需求剖析的可履行文件,然后我们能够经过connect()方法衔接到调试器,衔接后会创建一个持久会话直到python脚本完毕则衔接会被强制断开,在此期间可调用is_connect()查看该链接是否还存在,具体代码如下所示。
fromLyScript32importMyDebugif__name__==”__main__”:#初始化dbg=MyDebug()#衔接到调试器connect_flag=dbg.connect()print(“衔接状况:{}”.format(connect_flag))#检测套接字是否还在ref=dbg.is_connect()print(“是否在衔接:”,ref)dbg.close()LyScript插件默认没有批量载入功能,导致用户只能手动将被调试进程拖入到x64dbg中才可以调试,使用python模拟快捷键即可解决这个问题,具体使用代码如下。
importwin32apiimportwin32gui,win32conimportwin32clipboardimportreimporttimefromLyScript32importMyDebugclasscWindow:def__init__(self):self._hwnd=NonedefSetAsForegroundWindow(self):win32gui.SetForegroundWindow(self._hwnd)defMaximize(self):#最大化win32gui.ShowWindow(self._hwnd,win32con.SW_MAXIMIZE)def_window_enum_callback(self,hwnd,regex):ifself._hwndisNoneandre.match(regex,str(win32gui.GetWindowText(hwnd)))isnotNone:self._hwnd=hwnddeffind_window_regex(self,regex):self._hwnd=Nonewin32gui.EnumWindows(self._window_enum_callback,regex)defhide_always_on_top_windows(self):win32gui.EnumWindows(self._window_enum_callback_hide,None)def_window_enum_callback_hide(self,hwnd,unused):ifhwnd!=self._hwnd:ifwin32gui.IsWindowVisible(hwnd)andwin32gui.GetWindowLong(hwnd,win32con.GWL_EXSTYLE)&win32con.WS_EX_TOPMOST:className=win32gui.GetClassName(hwnd)ifnot(className=='Button'orclassName=='Shell_TrayWnd'):win32gui.ShowWindow(hwnd,win32con.SW_FORCEMINIMIZE)defOpenFile(self,path):#按下F3win32api.keybd_event(0x72,0,0,0)win32api.keybd_event(0x72,0,win32con.KEYEVENTF_KEYUP,0)#打开剪贴板win32clipboard.OpenClipboard()#清空剪贴板win32clipboard.EmptyClipboard()#设置剪贴板内容win32clipboard.SetClipboardData(win32con.CF_UNICODETEXT,path)#获取剪贴板内容date=win32clipboard.GetClipboardData()print("[*]OpenFile={}".format(date))#关闭剪贴板win32clipboard.CloseClipboard()time.sleep(0.2)#按下ctrl+vwin32api.keybd_event(0x11,0,0,0)win32api.keybd_event(0x56,0,0,0)win32api.keybd_event(0x56,0,win32con.KEYEVENTF_KEYUP,0)win32api.keybd_event(0x11,0,win32con.KEYEVENTF_KEYUP,0)#按下回车win32api.keybd_event(0x0D,0,0,0)win32api.keybd_event(0x0D,0,win32con.KEYEVENTF_KEYUP,0)defdeatch(self):#按下Ctrl+Alt+F2win32api.keybd_event(0x11,0,0,0)win32api.keybd_event(0x12,0,0,0)win32api.keybd_event(0x71,0,0,0)win32api.keybd_event(0x11,0,win32con.KEYEVENTF_KEYUP,0)win32api.keybd_event(0x12,0,win32con.KEYEVENTF_KEYUP,0)win32api.keybd_event(0x71,0,win32con.KEYEVENTF_KEYUP,0)#打开调试程序defOpenFile(path):regex=".*x32dbg.*"cWindows=cWindow()cWindows.find_window_regex(regex)cWindows.SetAsForegroundWindow()cWindows.SetAsForegroundWindow()cWindows.OpenFile(path)#关闭调试程序defDeatchFile():regex=".*x32dbg.*"cWindows=cWindow()cWindows.find_window_regex(regex)cWindows.SetAsForegroundWindow()cWindows.SetAsForegroundWindow()cWindows.deatch()#得到脚本返回值defGetScriptValue(dbg,script):try:ref=dbg.run_command_exec("pusheax")ifref!=True:returnNoneref=dbg.run_command_exec(f"eax={script}")ifref!=True:returnNonereg=dbg.get_register("eax")ref=dbg.run_command_exec("popeax")ifref!=True:returnNonereturnregexceptException:returnNonereturnNoneif__name__=="__main__":dbg=MyDebug()dbg.connect()#批量打开一个列表foritemin["D:\Win32Project.exe","D:\WindowsTools\C32ASM\c32asm.exe"]:OpenFile(item)time.sleep(3)foriinrange(1,100):dbg.set_debug("StepIn")time.sleep(0.2)eip=dbg.get_register("eip")print("eip=>{}".format(hex(eip)))time.sleep(3)DeatchFile() </div> <div class="zixun-tj-product adv-bottom"></div> </div> </div> <div class="prve-next-news">Python怎么利用LyScript插件实现批量打开关闭进程的详细内容,希望对您有所帮助,信息来源于网络。