VUE如何实现element upload上传图片到阿里云的案例
导读:本文共4096.5字符,通常情况下阅读需要14分钟。同时您也可以点击右侧朗读,来听本文内容。按键盘←(左) →(右) 方向键可以翻页。
摘要: 首先安装依赖cnpm install ali-oss封装client若是想减小打包后静态资源大小,可在index.html引入:(然后在client.js里注释掉const OSS = require(‘ali-oss'))<script src="http://gosspublic.alicdn.com/aliyun-oss-sdk-4... ...
音频解说
目录
(为您整理了一些要点),点击可以直达。首先安装依赖
cnpm install ali-oss
封装client
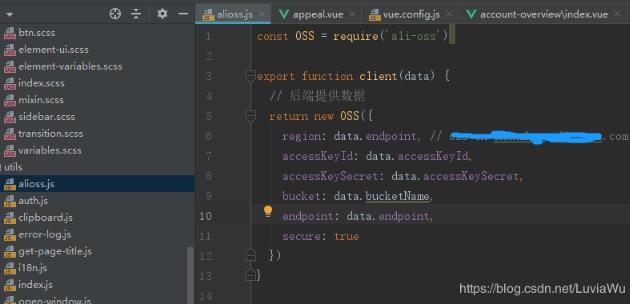
若是想减小打包后静态资源大小,可在index.html引入:(然后在client.js里注释掉const OSS = require(‘ali-oss'))
<script src="http://gosspublic.alicdn.com/aliyun-oss-sdk-4.4.4.min.js"></script>
const OSS = require('ali-oss')export function client(data) { // 后端提供数据 return new OSS({ region: data.endpoint, // *****.aliyuncs.com accessKeyId: data.accessKeyId, accessKeySecret: data.accessKeySecret, bucket: data.bucketName, endpoint: data.endpoint, secure: true })}然后,在vue页面引用,给client传入后台返回的阿里数据
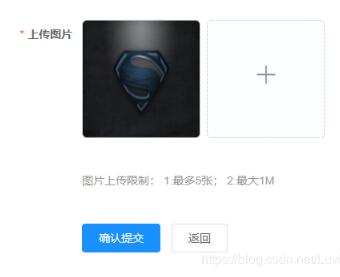
结果如下图:
1、HTML部分
<el-upload action="" :http-request="Upload" :data="Aliyun" :multiple="false" :show-file-list="true" list-type="picture-card" :on-preview="handlePictureCardPreview" :on-remove="handleRemove" :limit="5"> <i class="el-icon-plus" /></el-upload><el-dialog :visible.sync="dialogVisible"> <img width="100%" :src="dialogImageUrl" alt=""></el-dialog><p >图片上传限制: 1.最多5张; 2.最大1M</p>
2、JS部分
import { getAliyun, createOrder } from '@/api/order-management'import { client } from '@/utils/alioss'export default { name: 'Appeal', data() { return { dialogImageUrl: '', dialogVisible: false, Aliyun: {}, // 存签名信息 progress: 0, // 进度条 imgUrl: [] // 存上传后的图片url } }, created() { this.getAliyun() }, methods: { // 获取阿里云数据 async getAliyun() { const { data } = await getAliyun() this.Aliyun = data }, // 上传图片 Upload(file) { const that = this // 判断扩展名 const tmpcnt = file.file.name.lastIndexOf('.') const exname = file.file.name.substring(tmpcnt + 1) const names = ['jpg', 'jpeg', 'png'] if (names.indexOf(exname) < 0) { this.$message.error('不支持的格式!') return } if (file.size > 1024 * 1024) { this.$message.error('图片大小最大1M') return } async function multipartUpload() { // const fileName = that.name + file.file.uid const fileName = that.Aliyun.objectName + +'/' + Date.now() + '-' + file.file.name // fileName = aliyunConfig.objectName+'/'+Date.now()+'-'+file.name //所要上传的文件名拼接 (test/) // 定义唯一的文件名,打印出来的uid其实就是时间戳 // client 是第一步中的 client client(that.Aliyun).put(fileName, file.file, { progress: function(p) { // 获取进度条的值 console.log(p) that.progress = p * 100 } }).then( result => { // 下面是如果对返回结果再进行处理,根据项目需要 // console.log(result) // that.imgUrl = 'http://' + result.bucket + '.' + that.Aliyun.endpoint + '/' + result.name that.dialogImageUrl = result.url that.imgUrl.push({ name: file.file.name, url: result.url }) console.log(that.imgUrl) }).catch(err => { console.log('err:', err) }) } multipartUpload() }, // 图片预览 handlePictureCardPreview(file) { this.dialogImageUrl = file.url this.dialogVisible = true }, // 删除图片 handleRemove(file, fileList) { // console.log(file) for (var i in this.imgUrl) { if (this.imgUrl[i].name === file.name) { this.imgUrl.splice(i, 1) } } } }}</script>补充知识:vue-cli项目中,配合element_ui来实现上传图片与视频到oss上。
<template> <div class="basicInfo"> <el-upload class="avatar-content" v-loading="fileLoading" accept="image/*" drag action="https://zxcity-app.oss-cn-hangzhou.aliyuncs.com" :show-file-list="false" :data="ossParams" :before-upload="checkParams" :on-progress="progress" :on-error="uploadErr" :on-success="uploadSuccess" :on-remove="fileListRemove" multiple > </el-upload> <div v-for="(item,index) in fileList" :key="index" class="imgDiv"> <img :src="item.imgUrl" alt=""> <p>{{item.progress}}</p> </div> </div></template><script>import axios from 'axios'export default { data () { return { form: { url: '' }, fileList: [], fileLoading: false, ossParams: { expireTime: '', key: '', dir: '' } } }, methods: { // 图片上传前检测参数变化 checkParams (file) { var _this = this var promise = new Promise((resolve, reject) => { axios.get('https://share.zxtest.izxcs.com/zxcity_restful/ws/oss/ossUpload', {}) .then(function (response) { var params = response.data _this.ossParams = params _this.ossParams.name = file.name _this.ossParams.OSSAccessKeyId = params.accessid _this.ossParams.success_action_status = '200' _this.ossParams.key = params.dir + '/' + _this.getUUID() var obj = { name: _this.ossParams.name, key: _this.ossParams.key, host: _this.ossParams.host, progress: 0, imgUrl: '' } _this.fileList.push(obj) // _this.fileLoading = true resolve() }) .catch(function (error) { console.log(error, '错误') reject(error) }) }) return promise }, // 上传中 progress (event, file, fileList) { console.log('上传中...') console.log(file) console.log(fileList) this.fileList.forEach((item, index) => { if (item.name === file.name) { item.progress = parseInt(file.percentage) } }) }, // 上传失败提示 uploadErr (res) { this.$message.error('上传出错!') }, // 上传成功后上传到file表 uploadSuccess (response, file, fileList) { console.log('上传成功') this.fileList.forEach((item, index) => { if (item.name === file.name) { item.imgUrl = item.host + '/' + item.key item.progress = 100 } }) }, // 文件删除 fileListRemove (file, fileList) { this.form.url = '' }, // 随机名称 getUUID () { return `${this.str4()}${this.str4()}-${this.str4()}-${this.str4()}-${this.str4()}-${this.str4()}${this.str4()}${this.str4()}` }, str4 () { return (((1 + Math.random()) * 0x10000) | 0).toString(16).substring(1) } }}</script><style lang="less" scoped>.imgDiv{ display: block; float: left; width: 80px; height: 100px; border: 2px solid black; img{ display: block; width: 50px; height: 80px; } p{ font-size: 14px; text-align: center; }}</style> </div> <div class="zixun-tj-product adv-bottom"></div> </div> </div> <div class="prve-next-news">本文:
VUE如何实现element upload上传图片到阿里云的案例的详细内容,希望对您有所帮助,信息来源于网络。