Android实现水波纹外扩效果的实例代码
导读:本文共2742字符,通常情况下阅读需要9分钟。同时您也可以点击右侧朗读,来听本文内容。按键盘←(左) →(右) 方向键可以翻页。
摘要: 微信曾经推出了一个查找附近好友的功能,大致功能是这样的:屏幕上有一个按钮,长按按钮的时候,会有一圈圈水波纹的动画向外扩散,松手后,动画结束。现在简单来实现这样的一个动画功能:思路: 主要用到了下面的蓝色的图片,定义三个ImageView,background都设置为蓝色的图片,然后定义一个包括缩放和透明度变化的动画集,然后每隔一段时间,让3个ImageV... ...
音频解说
目录
(为您整理了一些要点),点击可以直达。微信曾经推出了一个查找附近好友的功能,大致功能是这样的:屏幕上有一个按钮,长按按钮的时候,会有一圈圈水波纹的动画向外扩散,松手后,动画结束。
现在简单来实现这样的一个动画功能:
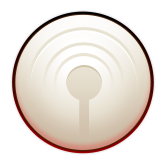
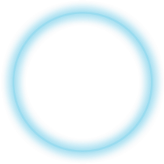
思路: 主要用到了下面的蓝色的图片,定义三个ImageView,background都设置为蓝色的图片,然后定义一个包括缩放和透明度变化的动画集,然后每隔一段时间,让3个ImageView依次启动这个动画集,看起来就像蓝色的圆圈像水波纹向外扩散一样。
相关实现逻辑如下:
activity_main.xml
<RelativeLayout xmlns:android="http://schemas.android.com/apk/res/android" android:layout_width="match_parent" android:layout_height="match_parent" > <ImageView android:id="@+id/wave1" android:layout_width="150dp" android:layout_height="150dp" android:layout_centerInParent="true" android:background="@drawable/wave" /> <ImageView android:id="@+id/wave2" android:layout_width="150dp" android:layout_height="150dp" android:layout_centerInParent="true" android:background="@drawable/wave"/> <ImageView android:id="@+id/wave3" android:layout_width="150dp" android:layout_height="150dp" android:layout_centerInParent="true" android:background="@drawable/wave" /> <ImageView android:id="@+id/normal" android:layout_width="166dp" android:layout_height="166dp" android:layout_centerInParent="true" android:background="@drawable/normal" /> </RelativeLayout>
MainActivity.java
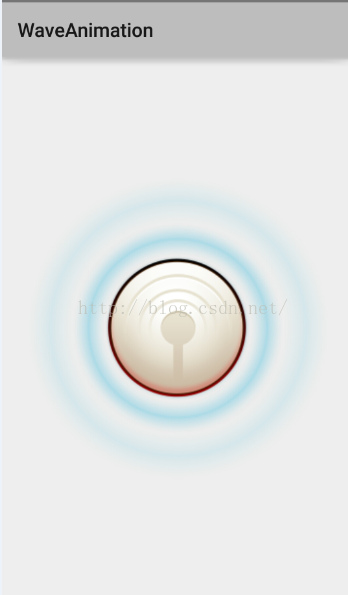
package com.jackie.waveanimation; import android.app.Activity; import android.os.Bundle; import android.os.Handler; import android.os.Message; import android.view.MotionEvent; import android.view.View; import android.view.animation.AlphaAnimation; import android.view.animation.AnimationSet; import android.view.animation.ScaleAnimation; import android.widget.ImageView; public class MainActivity extends Activity { private ImageView mNormal, mWave1, mWave2, mWave3; private AnimationSet mAnimationSet1, mAnimationSet2, mAnimationSet3; private static final int OFFSET = 600; //每个动画的播放时间间隔 private static final int MSG_WAVE2_ANIMATION = 2; private static final int MSG_WAVE3_ANIMATION = 3; private Handler mHandler = new Handler() { @Override public void handleMessage(Message msg) { switch (msg.what) { case MSG_WAVE2_ANIMATION: mWave2.startAnimation(mAnimationSet2); break; case MSG_WAVE3_ANIMATION: mWave3.startAnimation(mAnimationSet3); break; } } }; @Override protected void onCreate(Bundle savedInstanceState) { super.onCreate(savedInstanceState); setContentView(R.layout.activity_main); mNormal = (ImageView) findViewById(R.id.normal); mWave1 = (ImageView) findViewById(R.id.wave1); mWave2 = (ImageView) findViewById(R.id.wave2); mWave3 = (ImageView) findViewById(R.id.wave3); mAnimationSet1 = initAnimationSet(); mAnimationSet2 = initAnimationSet(); mAnimationSet3 = initAnimationSet(); mNormal.setOnTouchListener(new View.OnTouchListener() { @Override public boolean onTouch(View v, MotionEvent event) { switch (event.getAction()) { case MotionEvent.ACTION_DOWN: showWaveAnimation(); break; case MotionEvent.ACTION_UP: clearWaveAnimation(); break; case MotionEvent.ACTION_CANCEL: clearWaveAnimation(); } return true; } }); } private AnimationSet initAnimationSet() { AnimationSet as = new AnimationSet(true); ScaleAnimation sa = new ScaleAnimation(1f, 2.3f, 1f, 2.3f, ScaleAnimation.RELATIVE_TO_SELF, 0.5f, ScaleAnimation.RELATIVE_TO_SELF, 0.5f); sa.setDuration(OFFSET * 3); sa.setRepeatCount(Animation.INFINITE);// 设置循环 AlphaAnimation aa = new AlphaAnimation(1, 0.1f); aa.setDuration(OFFSET * 3); aa.setRepeatCount(Animation.INFINITE);//设置循环 as.addAnimation(sa); as.addAnimation(aa); return as; } private void showWaveAnimation() { mWave1.startAnimation(mAnimationSet1); mHandler.sendEmptyMessageDelayed(MSG_WAVE2_ANIMATION, OFFSET); mHandler.sendEmptyMessageDelayed(MSG_WAVE3_ANIMATION, OFFSET * 2); } private void clearWaveAnimation() { mWave1.clearAnimation(); mWave2.clearAnimation(); mWave3.clearAnimation(); } } 效果如下:

以上就是本文的全部内容,希望对大家的学习有所帮助,也希望大家多多支持。
</div> <div class="zixun-tj-product adv-bottom"></div> </div> </div> <div class="prve-next-news">本文:
Android实现水波纹外扩效果的实例代码的详细内容,希望对您有所帮助,信息来源于网络。