python实现烟花的实例代码怎么编写
导读:本文共2314字符,通常情况下阅读需要8分钟。同时您也可以点击右侧朗读,来听本文内容。按键盘←(左) →(右) 方向键可以翻页。
摘要: 实现代码如下:#-*-coding:utf-8-*-importmath,random,timeimportthreadingimporttkinterastkimportre#importuuidFireworks=[]maxFireworks=8height,width=600,600classfirework(object):de... ...
音频解说
目录
(为您整理了一些要点),点击可以直达。实现代码如下:
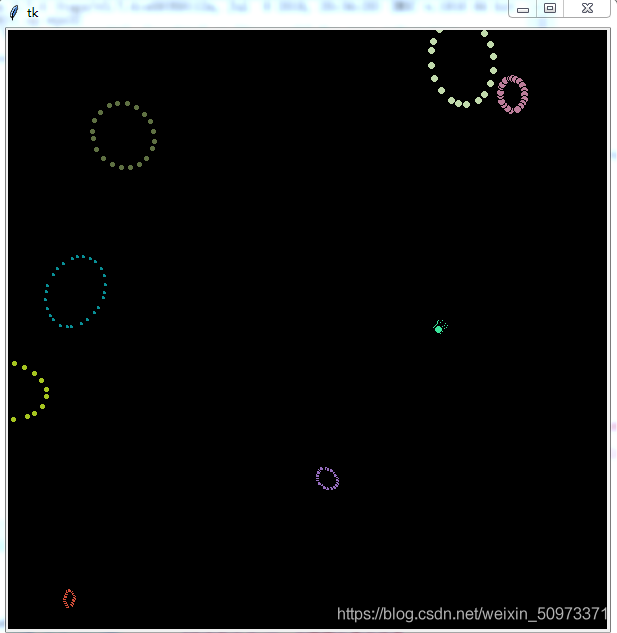
#-*-coding:utf-8-*-importmath,random,timeimportthreadingimporttkinterastkimportre#importuuidFireworks=[]maxFireworks=8height,width=600,600classfirework(object):def__init__(self,color,speed,width,height):#uid=uuid.uuid1()self.radius=random.randint(2,4)#粒子半径为2~4像素self.color=color#粒子颜色self.speed=speed#speed是1.5-3.5秒self.status=0#在烟花未爆炸的情况下,status=0;爆炸后,status>=1;当status>100时,烟花的生命期终止self.nParticle=random.randint(20,30)#粒子数量self.center=[random.randint(0,width-1),random.randint(0,height-1)]#烟花随机中心坐标self.oneParticle=[]#原始粒子坐标(100%状态时)self.rotTheta=random.uniform(0,2*math.pi)#椭圆平面旋转角#椭圆参数方程:x=a*cos(theta),y=b*sin(theta)#ellipsePara=[a,b]self.ellipsePara=[random.randint(30,40),random.randint(20,30)]theta=2*math.pi/self.nParticleforiinrange(self.nParticle):t=random.uniform(-1.0/16,1.0/16)#产生一个[-1/16,1/16)的随机数x,y=self.ellipsePara[0]*math.cos(theta*i+t),self.ellipsePara[1]*math.sin(theta*i+t)#椭圆参数方程xx,yy=x*math.cos(self.rotTheta)-y*math.sin(self.rotTheta),y*math.cos(self.rotTheta)+x*math.sin(self.rotTheta)#平面旋转方程self.oneParticle.append([xx,yy])self.curParticle=self.oneParticle[0:]#当前粒子坐标self.thread=threading.Thread(target=self.extend)#建立线程对象defextend(self):#粒子群状态变化函数线程foriinrange(100):self.status+=1#更新状态标识self.curParticle=[[one[0]*self.status/100,one[1]*self.status/100]foroneinself.oneParticle]#更新粒子群坐标time.sleep(self.speed/50)defexplode(self):self.thread.setDaemon(True)#把现程设为守护线程self.thread.start()#启动线程def__repr__(self):return('color:{color}\n''speed:{speed}\n''numberofparticle:{np}\n''center:[{cx},{cy}]\n''ellipse:a={ea},b={eb}\n''particle:\n{p}\n').format(color=self.color,speed=self.speed,np=self.nParticle,cx=self.center[0],cy=self.center[1],p=str(self.oneParticle),ea=self.ellipsePara[0],eb=self.ellipsePara[1])defcolorChange(fire):rgb=re.findall(r'(.{2})',fire.color[1:])cs=fire.statusf=lambdax,c:hex(int(int(x,16)*(100-c)/30))[2:]#当粒子寿命到70%时,颜色开始线性衰减ifcs>70:ccr,ccg,ccb=f(rgb[0],cs),f(rgb[1],cs),f(rgb[2],cs)else:ccr,ccg,ccb=rgb[0],rgb[1],rgb[2]return'#{0:0>2}{1:0>2}{2:0>2}'.format(ccr,ccg,ccb)defappendFirework(n=1):#递归生成烟花对象ifn>maxFireworksorlen(Fireworks)>maxFireworks:passelifn==1:cl='#{0:0>6}'.format(hex(int(random.randint(0,16777215)))[2:])#产生一个0~16777215(0xFFFFFF)的随机数,作为随机颜色a=firework(cl,random.uniform(1.5,3.5),width,height)Fireworks.append({'particle':a,'points':[]})#建立粒子显示列表,‘particle'为一个烟花对象,‘points'为每一个粒子显示时的对象变量集a.explode()else:appendFirework()appendFirework(n-1)defshow(c):forpinFireworks:#每次刷新显示,先把已有的所以粒子全部删除forppinp['points']:c.delete(pp)forpinFireworks:#根据每个烟花对象,计算其中每个粒子的显示对象oneP=p['particle']ifoneP.status==100:#状态标识为100,说明烟花寿命结束Fireworks.remove(p)#移出当前烟花appendFirework()#新增一个烟花continueelse:li=[[int(cp[0]*2)+oneP.center[0],int(cp[1]*2)+oneP.center[1]]forcpinoneP.curParticle]#把中心为原点的椭圆平移到随机圆心坐标上color=colorChange(oneP)#根据烟花当前状态计算当前颜色forppinli:p['points'].append(c.create_oval(pp[0]-oneP.radius,pp[1]-oneP.radius,pp[0]+oneP.radius,pp[1]+oneP.radius,fill=color))#绘制烟花每个粒子root.after(50,show,c)#回调,每50ms刷新一次if__name__=='__main__':appendFirework(maxFireworks)root=tk.Tk()cv=tk.Canvas(root,height=height,width=width)cv.create_rectangle(0,0,width,height,fill="black")cv.pack()root.after(50,show,cv)root.mainloop()图片展示:
</div> <div class="zixun-tj-product adv-bottom"></div> </div> </div> <div class="prve-next-news">本文:
python实现烟花的实例代码怎么编写的详细内容,希望对您有所帮助,信息来源于网络。