Linux系统搭建Apache服务器的步骤是什么
导读:本文共5460字符,通常情况下阅读需要18分钟。同时您也可以点击右侧朗读,来听本文内容。按键盘←(左) →(右) 方向键可以翻页。
摘要: apache服务器简介:Apache是目前世界上使用最广泛的一种web server,它以跨平台,高效和稳定而闻名。Apache缺点是变得越来越重,被普遍认为是重量级的web server。(Apache主要采用的是基于进程的Prefork模式(还有基于线程的Worker模式),也就是,对于每个请求会用一个进程去进行服务,进程非常占资源,当并发量大的时候,就需要... ...
目录
(为您整理了一些要点),点击可以直达。apache服务器简介:
Apache是目前世界上使用最广泛的一种web server,它以跨平台,高效和稳定而闻名。
Apache缺点是变得越来越重,被普遍认为是重量级的web server。(Apache主要采用的是基于进程的Prefork模式(还有基于线程的Worker模式),也就是,对于每个请求会用一个进程去进行服务,进程非常占资源,当并发量大的时候,就需要等额的进程,导致的是高内存占用和CPU占用,这就是所谓的“重量级”。
Apache是基于模块化设计的,总体上看起来代码的可读性高于php代码,它的核心代码并不多,大多数的功能都被分割到各种模块中,各个模块在系统启动时按需载入。
Linux系统搭建apache服务器详细步骤:
压缩包安装方式
1、下载httpd-2.4.29.tar.gz
2、上传到服务器/usr/local/software
tar-zxvfhttpd-2.4.29.tar.gz``./configure--prefix=/usr/local/apache2/#设置apache安装目录
若没有安装过Apr,会报错:
checking``for``APR...no``configure:error:APRnotfound.Pleasereadthedocumentation.
3、接下来安装apr,首先下载apr-1.6.3.tar.gz
4、上传到服务器/usr/local/software
tar-zxvfapr-1.6.3.tar.gz``cdapr-1.6.3``.configure``make``makeinstall
又会报错:
checking``for``APR-util...no``configure:error:APR-utilnotfound.Pleasereadthedocumentation.
5、下载apr-util-1.6.1.tar.gz
6、上传到服务器/usr/local/software
tar-zxvfapr-util-1.6.1.tar.gz``cdapr-util-1.6.1``./configure--prefix=/usr/local/apr-util/--with-apr=/usr/local/apr
此时还会报错:
xml/apr_xml.c:35:19:致命错误:expat.h:没有那个文件或目录````#``include``````^``编译中断。``make:***[xml/apr_xml.lo]错误1
7、猜测是可能缺expat的开发库
yuminstallexpat-devel#中间会让你输入y``./configure--prefix=/usr/local/apr-util/--with-apr=/usr/local/apr``make#成功!``makeinstall
8、此时再回去安装apache,不仅要指定apr的路径,还要指定apr-util的路径
./configure--prefix=/usr/local/apache2/--with-apr=/usr/local/apr/--with-apr-util=/usr/local/apr-util/
依旧报错,不少人到这里可能已经崩溃了,但这个错误跟前面遇到的类似
checking``for``pcre-config...false``configure:error:pcre-config``for``libpcrenotfound.PCREisrequired``and``availablefromhttp:``//pcre.org/
9、下载pcre-8.41.tar.gz
10、上传到服务器/usr/local/software
tar-zxvfpcre-8.41.tar.gz``./configure
又再次报错,我保证这是最后一次了
checkingwindows.husability...no``checkingwindows.hpresence...no``checking``for``windows.h...no``configure:error:YouneedaC++compiler``for``C++support.
10、安装c++环境
yuminstall-ygccgcc-c++``#错了那么多次,别忘了现在的位置,接下来还是要安装pcre``./configure``make``makeinstall
11、好了,绕了一大圈,接下来还是要安装apache
cd..``cdapache``./configure--prefix=/usr/local/apache2/--with-apr=/usr/local/apr/--with-apr-util=/usr/local/apr-util/``make``makeinstall
好惨啊!最后一步又报错:
/usr/local/apr-util``//lib/libaprutil-1.so:undefinedreferenceto`XML_GetErrorCode'``/usr/local/apr-util``//lib/libaprutil-1.so:undefinedreferenceto`XML_SetEntityDeclHandler'``/usr/local/apr-util``//lib/libaprutil-1.so:undefinedreferenceto`XML_ParserCre``collect2:error:ldreturned1``exit``status``make[2]:***[htpasswd]错误1``make[2]:Leavingdirectory`/usr/local/software/apache/support'``make[1]:***[all-recursive]错误1``make[1]:Leavingdirectory`/usr/local/software/apache/support'
这种报错没见过,果断网上搜索一番,答案即是:apr版本太高;
12、于是我下载了apr-util-1.5 http://archive.apache.org/dist/apr/apr-util-1.5.2.tar.gz
13、上传到服务器/usr/local/software
tar-zxvfapr-util-1.5.2.tar.gz``cdapr-util-1.5.2``./configure--prefix=/usr/local/apr-util-1.5/--with-apr=/usr/local/apr``make``makeinstall
14、重复步骤11,唯一不同的地方就是现在配置指定的是:apr-util-1.5,这很重要!!!
cd..``cdapache``./configure--prefix=/usr/local/apache2/--with-apr=/usr/local/apr/--with-apr-util=/usr/local/apr-util-1.5/``make#make时间会比较长``makeinstall
完美结尾:
Installingconfigurationfiles``mkdir``/usr/local/apache2/conf``mkdir``/usr/local/apache2/conf/extra``mkdir``/usr/local/apache2/conf/original``mkdir``/usr/local/apache2/conf/original/extra``InstallingHTMLdocuments``mkdir``/usr/local/apache2/htdocs``Installingerrordocuments``mkdir``/usr/local/apache2/error``Installingicons``mkdir``/usr/local/apache2/icons``mkdir``/usr/local/apache2/logs``InstallingCGIs``mkdir``/usr/local/apache2/cgi-bin``Installingheaderfiles``mkdir``/usr/local/apache2/``include``Installingbuildsystemfiles``mkdir``/usr/local/apache2/build``Installingmanpages``and``onlinemanual``mkdir``/usr/local/apache2/man``mkdir``/usr/local/apache2/man/man1``mkdir``/usr/local/apache2/man/man8``mkdir``/usr/local/apache2/manual``make[1]:Leavingdirectory`/usr/local/software/apache'
15、进入配置文件位置:/usr/local/apache2/conf
cphttpd.confhttpd.conf.bak#备份配置文件``vimhttpd.conf``#放掉191行的注释,修改为:``ServerName[你的IP]:80``:wq
16、启动apache
/usr/local/apache2/bin/apachectlstart``#或者``/usr/local/apache2``//bin/httpd-kstart
关闭防火墙,在浏览器地址栏中输入服务器的ip就会出现网页:It works!
17、关闭apache
ps-ef|grepapache``/usr/local/apache2/bin/apachectlstop``#或者``/usr/local/apache2``//bin/httpd-kstop``#没错,bin前面就是``//
这种原文件安装的方式太过复杂,其实安装apache服务还有另一种方式,不知道跟我前面这种安装有没有冲突,今天也一并试一试。
yum源安装方式
1、yum源安装(需要联网下载)
首先关闭apache服务``yuminstallhttpd#中间过程中输入:y
Result:
作为依赖被安装:
``apr.x86_640:1.4.8-3.el7_4.1````apr-util.x86_640:1.5.2-6.el7````httpd-tools.x86_640:2.4.6-67.el7.centos.6````mailcap.noarch0:2.1.41-2.el7``完毕!
2、yum的安装位置在:/etc/httpd/conf,我进入后备份配置文件先,修改的地方跟之前不一样,在95行,仅供参考
cd/etc/httpd/conf``cphttpd.confhttpd.conf.bak``#放掉95行的注释,修改为:``ServerName[你的IP]:80``:wq
3、启动服务
systemctlstarthttpd.service
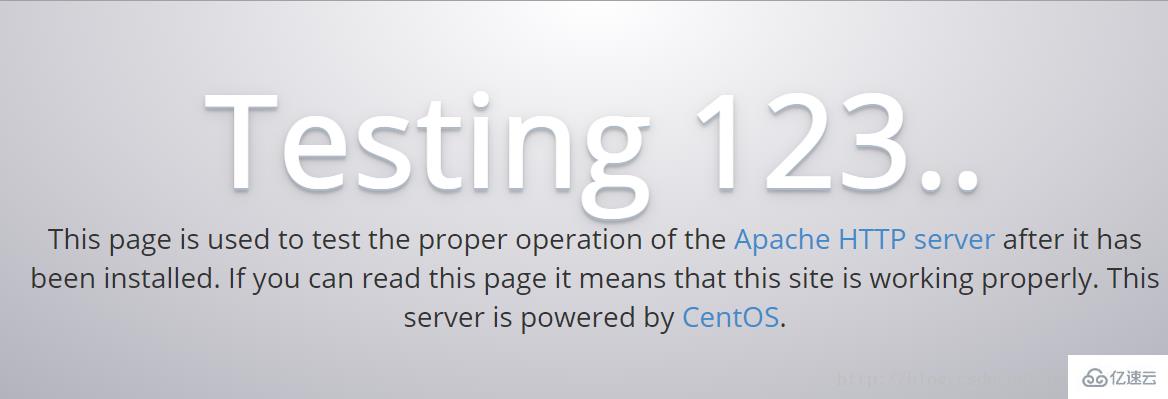
在浏览器输入ip,出现apache预置的html,完美!!!
 4、关闭服务
systemctlstophttpd.service
5、我再次去启动第一种方式安装的httpd
/usr/local/apache2/bin/apachectlstart
刷新浏览器赫然出现:It works!,说明两种安装方式没有冲突哈。
</div> <div class="zixun-tj-product adv-bottom"></div> </div> </div> <div class="prve-next-news">Linux系统搭建Apache服务器的步骤是什么的详细内容,希望对您有所帮助,信息来源于网络。