SpringBoot如何整合Druid、Redis
导读:本文共3472.5字符,通常情况下阅读需要12分钟。同时您也可以点击右侧朗读,来听本文内容。按键盘←(左) →(右) 方向键可以翻页。
摘要: 1.整合Druid1.1Druid简介Java程序很大一部分要操作数据库,为了提高性能操作数据库的时候,又不得不使用数据库连接池。Druid 是阿里巴巴开源平台上一个数据库连接池实现,结合了 C3P0、DBCP 等 DB 池的优点,同时加入了日志监控。Druid 可以很好的监控 DB 池连接和 SQL 的执行情况,天生就是针对监控而生的 DB 连接池。1.2添加... ...
音频解说
目录
(为您整理了一些要点),点击可以直达。1.整合Druid
1.1Druid简介
Java程序很大一部分要操作数据库,为了提高性能操作数据库的时候,又不得不使用数据库连接池。
Druid 是阿里巴巴开源平台上一个数据库连接池实现,结合了 C3P0、DBCP 等 DB 池的优点,同时加入了日志监控。
Druid 可以很好的监控 DB 池连接和 SQL 的执行情况,天生就是针对监控而生的 DB 连接池。
1.2添加上 Druid 数据源依赖
<dependency><groupId>com.alibaba</groupId><artifactId>druid-spring-boot-starter</artifactId><version>1.2.8</version></dependency>
1.3使用Druid 数据源
server:port:8080spring:datasource:druid:url:jdbc:mysql://localhost:3306/eshop?useSSL=false&serverTimezone=Asia/Shanghai&useUnicode=true&characterEncoding=utf-8&allowPublicKeyRetrieval=trueusername:xxxpassword:xxxdriver-class-name:com.mysql.cj.jdbc.Driverinitial-size:10max-active:20min-idle:10max-wait:60000time-between-eviction-runs-millis:60000min-evictable-idle-time-millis:300000stat-view-servlet:enabled:truelogin-username:adminlogin-password:1234logging:level:com.wyy.spring.Dao:debug
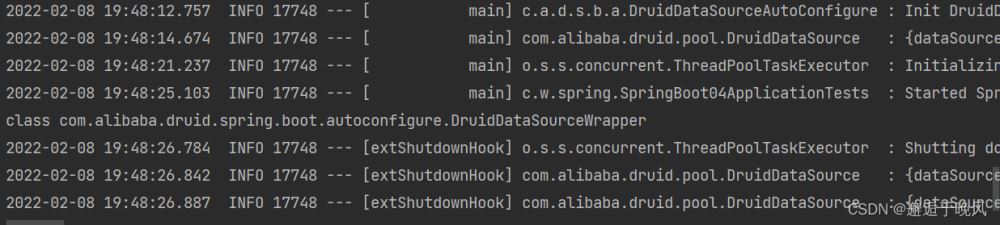
测试一下看是否成功!
packagecom.wyy.spring;importcom.wyy.spring.Dao.StudentMapper;importcom.wyy.spring.service.StudentService;importorg.junit.jupiter.api.Test;importorg.springframework.beans.factory.annotation.Autowired;importorg.springframework.boot.test.context.SpringBootTest;importjavax.sql.DataSource;@SpringBootTestclassSpringBoot04ApplicationTests{@AutowiredDataSourcedataSource;@TestvoidcontextLoads(){System.out.println(dataSource.getClass());}}打印结果
2.整合redis
2.1添加上 redis依赖
<dependency><groupId>org.springframework.boot</groupId><artifactId>spring-boot-starter-data-redis</artifactId></dependency>
2.2yml添加redis配置信息
redis:database:0host:120.0.0.0port:6379password:xxxxjedis:pool:max-active:8max-wait:-1max-idle:8min-idle:0timeout:10000
2.3 redis 配置类
packagecom.wyy.spring.conf;importorg.springframework.cache.CacheManager;importorg.springframework.cache.annotation.CachingConfigurerSupport;importorg.springframework.cache.annotation.EnableCaching;importorg.springframework.cache.interceptor.KeyGenerator;importorg.springframework.context.annotation.Bean;importorg.springframework.context.annotation.Configuration;importorg.springframework.context.annotation.Primary;importorg.springframework.data.redis.cache.RedisCacheConfiguration;importorg.springframework.data.redis.cache.RedisCacheManager;importorg.springframework.data.redis.connection.RedisConnectionFactory;importorg.springframework.data.redis.core.RedisTemplate;importorg.springframework.data.redis.serializer.GenericJackson2JsonRedisSerializer;importorg.springframework.data.redis.serializer.RedisSerializationContext;importorg.springframework.data.redis.serializer.RedisSerializer;importorg.springframework.data.redis.serializer.StringRedisSerializer;importorg.springframework.util.ClassUtils;importjava.lang.reflect.Array;importjava.lang.reflect.Method;importjava.time.Duration;@Configuration@EnableCachingpublicclassRedisConfigurationextendsCachingConfigurerSupport{@Bean@Primary/***缓存管理器*/CacheManagercacheManager(RedisConnectionFactoryfactory){RedisCacheConfigurationcacheConfiguration=RedisCacheConfiguration.defaultCacheConfig().computePrefixWith(cacheName->cacheName+":-cache-:")/*设置缓存过期时间*/.entryTtl(Duration.ofHours(1))/*禁用缓存空值,不缓存null校验*/.disableCachingNullValues()/*设置CacheManager的值序列化方式为json序列化,可使用加入@Class属性*/.serializeValuesWith(RedisSerializationContext.SerializationPair.fromSerializer(newGenericJackson2JsonRedisSerializer()));/*使用RedisCacheConfiguration创建RedisCacheManager*/RedisCacheManagermanager=RedisCacheManager.builder(factory).cacheDefaults(cacheConfiguration).build();returnmanager;}publicRedisTemplateredisTemplate(RedisConnectionFactoryfactory){RedisTemplate<String,Object>redisTemplate=newRedisTemplate<String,Object>();redisTemplate.setConnectionFactory(factory);RedisSerializerstringSerializer=newStringRedisSerializer();/*key序列化*/redisTemplate.setKeySerializer(stringSerializer);/*value序列化*/redisTemplate.setValueSerializer(newGenericJackson2JsonRedisSerializer());/*Hashkey序列化*/redisTemplate.setHashKeySerializer(stringSerializer);/*Hashvalue序列化*/redisTemplate.setHashValueSerializer(newGenericJackson2JsonRedisSerializer());redisTemplate.afterPropertiesSet();returnredisTemplate;@OverridepublicKeyGeneratorkeyGenerator(){return(Objecttarget,Methodmethod,Object...params)->{finalintNO_PARAM_KEY=0;finalintNULL_PARAM_KEY=53;StringBuilderkey=newStringBuilder();/*Class.Method:*/key.append(target.getClass().getSimpleName()).append(".").append(method.getName()).append(":");if(params.length==0){returnkey.append(NO_PARAM_KEY).toString();}intcount=0;for(Objectparam:params){/*参数之间用,进行分隔*/if(0!=count){key.append(',');}if(param==null){key.append(NULL_PARAM_KEY);}elseif(ClassUtils.isPrimitiveArray(param.getClass())){intlength=Array.getLength(param);for(inti=0;i<length;i++){key.append(Array.get(param,i));key.append(',');}}elseif(ClassUtils.isPrimitiveOrWrapper(param.getClass())||paraminstanceofString){key.append(param);}else{/*JavaBean一定要重写hashCode和equals*/key.append(param.hashCode());count++;returnkey.toString();};}@CacheConfig 一个类级别的注解,允许共享缓存的cacheNames、KeyGenerator、CacheManager 和 CacheResolver
@Cacheable 用来声明方法是可缓存的。将结果存储到缓存中以便后续使用相同参数调用时不需执行实际的方 法。直接从缓存中取值
@CachePut 标注的方法在执行前不会去检查缓存中是否存在之前执行过的结果,而是每次都会执行该方法, 并将执行结果以键值对的形式存入指定的缓存中。
@CacheEvict 的作用 主要针对方法配置,能够根据一定的条件对缓存进行清空
</div> <div class="zixun-tj-product adv-bottom"></div> </div> </div> <div class="prve-next-news">本文:
SpringBoot如何整合Druid、Redis的详细内容,希望对您有所帮助,信息来源于网络。