基于elementUI实现图片预览组件的示例代码
导读:本文共3008.5字符,通常情况下阅读需要10分钟。同时您也可以点击右侧朗读,来听本文内容。按键盘←(左) →(右) 方向键可以翻页。
摘要: 这是一个简单的点击图片预览的组件顺便记录一下写组件期间踩的vue中scope的坑~从注册全局组件开始叭!项目目录:模仿elementUI目录结构,目录名是组件名,src中是组件源文件(或者js服务文件),文件目录下还有一个index.js用于同一管理src中的所有文件,导出并注册,这个组件我们只有一个vue文件件先看index.js文件里有什... ...
目录
(为您整理了一些要点),点击可以直达。这是一个简单的点击图片预览的组件
顺便记录一下写组件期间踩的vue中scope的坑~

从注册全局组件开始叭!
项目目录:
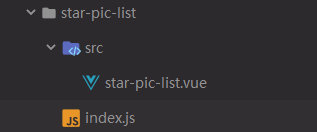
模仿elementUI目录结构,目录名是组件名,src中是组件源文件(或者js服务文件),文件目录下还有一个index.js用于同一管理src中的所有文件,导出并注册,这个组件我们只有一个vue文件件
先看index.js文件里有什么:
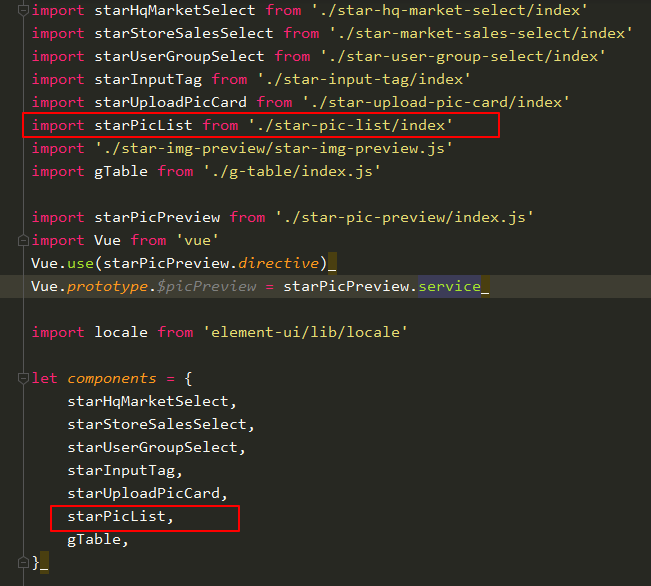
//引入了src下的vue组件文件import starPicList from './src/star-pic-list';/* istanbul ignore next */starPicList.install = function(Vue) { //starPicList.name这就是后面可以使用的组件的名字(star-pic-list.vue文件里面定义的name),install是默认的一个方法 Vue.component(starPicList.name, starPicList);};export default starPicList;接下来介绍一下install方法:
Vue.use( plugin ):安装 Vue.js 插件。如果插件是一个对象,必须提供 install 方法。如果插件是一个函数,它会被作为 install 方法。install 方法将被作为 Vue 的参数调用。当 install 方法被同一个插件多次调用,插件将只会被安装一次。Vue.js 的插件应当有一个公开方法 install 。这个方法的第一个参数是 Vue 构造器,第二个参数是一个可选的选项对象:
导出starPicList组件后在管理组件js文件中引用,然后由这个统一管理js文件导出注册到全局即可:

好了,这些是废话!
组件的使用:
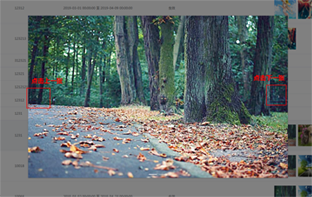
<!--图片列表形式,点击查看图片列表,点击显示上(下)一张--><template v-slot="scope"> <star-pic-list :data="scope.row.pic" :max-show="2"/></template>
参数
data: 传入图片数组;
max-show: 一次最多显示几张图片
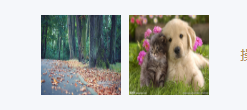
效果如下:
补充:vue组件开发中 style 添加scoped后,修改第三方组件样式没有效果问题:
在vue的开发中,我们通常和element-UI配合开发,就会遇到,在组件style中添加scoped后,element-ui中使用的子组件样式无法改变。
不用scoped,去掉这个属性,但是会污染全局样式,(可配合less 或者 scss(推荐scss),所有样式写在当前组件id或class下面)
组件源码:
<template> <div id="star-pic-vue"> <template v-if="data"> <img v-for="item in images" :src="item" id="contract_url" @click="enlargePic"/> <template v-if="isDialogShow"> </template> <el-dialog :visible.sync="centerDialogVisible" modal close-on-click-modal custom-class="dialog" > <el-carousel :autoplay="false" arrow="always"> <el-carousel-item v-for="item in data" :key="item"> <img :src="item"> </el-carousel-item> </el-carousel> </el-dialog> </template> </div></template><script> export default { name: "star-pic-list", props: ["data","maxShow"], data(){ return{ centerDialogVisible: false, showPic: '', isDialogShow: false, index: 0, } }, computed: { images() { if (this.data instanceof Array && this.data.length > 2) { return this.data.splice(0,this.maxShow) } else { return this.data } } }, methods: { // 放大图片 enlargePic(e){ this.isDialogShow = true; this.centerDialogVisible = true; this.showPic = this.data[0]; console.log(this.images) }, } }</script><style lang="less">#star-pic-vue{ width: 200px; height: auto; display: flex; flex-wrap: wrap; img{ width: 80px; height: 80px; margin: 4px; } .dialog { img{ width: 100%; height: 100%; margin: 0; } } .el-carousel__item h4 { color: #475669; font-size: 18px; opacity: 0.75; line-height: 300px; margin: 0; height: 100%; width: 100%; } .el-dialog__header{ display: none; } .el-dialog__body { padding: 0 !important; margin: 0 !important; height: 600px; } .el-carousel{ height: 100%; } .el-carousel__container { height: 100%; }}</style>更多组件点击这儿 --> link : github>components>star-pic-list
以上就是本文的全部内容,希望对大家的学习有所帮助,也希望大家多多支持。
</div> <div class="zixun-tj-product adv-bottom"></div> </div> </div> <div class="prve-next-news">基于elementUI实现图片预览组件的示例代码的详细内容,希望对您有所帮助,信息来源于网络。