Spring成员对象注入的三种方式是什么
导读:本文共3066.5字符,通常情况下阅读需要10分钟。同时您也可以点击右侧朗读,来听本文内容。按键盘←(左) →(右) 方向键可以翻页。
摘要: 当一个类运行需要调用一个成员对象,成员对象也是被容器类托管的类对象时,则可以用依赖注入创建成员对象。让容器类来帮你创建成员对象。前置:容器类AppConfigimportorg.springframework.context.annotation.ComponentScan;importorg.springframework.context.annotatio... ...
目录
(为您整理了一些要点),点击可以直达。当一个类运行需要调用一个成员对象,成员对象也是被容器类托管的类对象时,则可以用依赖注入创建成员对象。让容器类来帮你创建成员对象。
前置:
容器类AppConfig
importorg.springframework.context.annotation.ComponentScan;importorg.springframework.context.annotation.Configuration;@Configuration@ComponentScanpublicclassAppConfig{}创建一个接口Hello
publicinterfaceHello{voidHelloWorld();}创建一个类HelloImpl1实现接口Hello。并且被容器托管
importorg.springframework.stereotype.Component;@ComponentpublicclassHelloImpl1implementsHello{@OverridepublicvoidHelloWorld(){System.out.println("HelloWorld1");}}一、@Autowired注解
在声明成员变量上加上@Autowires注解。让容器来帮忙创建对象。该成员变量也必须被容器类托管。
创建MyHello类,里面有Hello成员对象。如下所示:
importorg.springframework.beans.factory.annotation.Autowired;importorg.springframework.stereotype.Component;@ComponentpublicclassMyHello{@AutowiredHelloh;voidsay(){h.HelloWorld();}}如果不加@Autowired运行say()会报错。
进行测试:
importorg.springframework.context.ApplicationContext;importorg.springframework.context.annotation.AnnotationConfigApplicationContext;publicclassTest{publicstaticvoidmain(String[]args){ApplicationContextac=newAnnotationConfigApplicationContext(AppConfig.class);MyHellomh=ac.getBean("myHello",MyHello.class);mh.say();}}运行结果:

如果成员对象是接口,并且有多个实现类。则需要使用@Qualifier或者@Primary注解。
在创建一个类实现Hello接口。
importorg.springframework.stereotype.Component;@ComponentpublicclassHelloImol2implementsHello{@OverridepublicvoidHelloWorld(){System.out.println("HelloWorld2");}}这时,Hello接口有两个实现类。
再次运行Test类,报错。因为调用类有冲突。

解决方案有两种。
@Qualifier
在@Autowired下加入@Qualifier(value="id名")。id名默认是类名且首字母小写。要指定是调用实现接口中的哪个类。
如上述解决:
importorg.springframework.beans.factory.annotation.Autowired;importorg.springframework.beans.factory.annotation.Qualifier;importorg.springframework.stereotype.Component;@ComponentpublicclassMyHello{@Autowired@Qualifier(value="helloImpl1")//添加此注解Helloh;voidsay(){h.HelloWorld();}}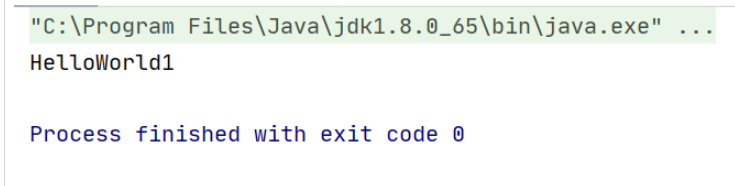
@Primary
在想要用到的多个实现接口对象中的其中一个类,加上@Primary注解
如: 我想通过Hello运行HelloImpl1。则在HelloImpl加上@Primary注解:
importorg.springframework.context.annotation.Primary;importorg.springframework.stereotype.Component;@Component@PrimarypublicclassHelloImpl1implementsHello{@OverridepublicvoidHelloWorld(){System.out.println("HelloWorld1");}}Test类运行成功

二、@Resource注解
在成员对象上加入@Resource(name="id名")id名为你想要调用这个接口中实现的哪个类的类名且首字母小写。
则上述的MyHello类可写成:
importorg.springframework.stereotype.Component;importjavax.annotation.Resource;@ComponentpublicclassMyHello{@Resource(name="helloImpl1")Helloh;voidsay(){h.HelloWorld();}}运行Test类
三、@Inject 和 @Named注解
使用这两个注解需要导入坐标。在pom.xml加入
<dependency><groupId>javax.inject</groupId><artifactId>javax.inject</artifactId><version>1</version></dependency>
两个注解一起用在需要创建成员对象上。其中@Named("id名")id名为你想要调用这个接口中实现的哪个类的类名且首字母小写。
则上述的MyHello类可以修改为:
importorg.springframework.stereotype.Component;importjavax.inject.Inject;importjavax.inject.Named;@ComponentpublicclassMyHello{@Inject@Named("helloImpl1")Helloh;voidsay(){h.HelloWorld();}}继续运行Test类,仍然可以运行成功
上述也可以实现set方法的依赖注入,需要保证传入的参数被容器托管。
</div> <div class="zixun-tj-product adv-bottom"></div> </div> </div> <div class="prve-next-news">Spring成员对象注入的三种方式是什么的详细内容,希望对您有所帮助,信息来源于网络。