SpringBoot中怎么使用WebSocket实现点对点消息
导读:本文共3293字符,通常情况下阅读需要11分钟。同时您也可以点击右侧朗读,来听本文内容。按键盘←(左) →(右) 方向键可以翻页。
摘要: 一、添加依赖,配置使用Spring Security 里的用户。<dependency><groupId>org.springframework.boot</groupId><artifactId>spring-boot-starter-security</artifactId></depe... ...
音频解说
目录
(为您整理了一些要点),点击可以直达。一、添加依赖,配置
使用Spring Security 里的用户。
<dependency><groupId>org.springframework.boot</groupId><artifactId>spring-boot-starter-security</artifactId></dependency>
我们现在需要配置用户信息和权限配置。
@ConfigurationpublicclassWebSecurityConfigextendsWebSecurityConfigurerAdapter{//指定密码的加密方式@SuppressWarnings("deprecation")@BeanPasswordEncoderpasswordEncoder(){//不对密码进行加密returnNoOpPasswordEncoder.getInstance();}//配置用户及其对应的角色@Overrideprotectedvoidconfigure(AuthenticationManagerBuilderauth)throwsException{auth.inMemoryAuthentication().withUser("admin").password("123").roles("ADMIN","USER").and().withUser("hangge").password("123").roles("USER");}//配置URL访问权限@Overrideprotectedvoidconfigure(HttpSecurityhttp)throwsException{http.authorizeRequests()//开启HttpSecurity配置.anyRequest().authenticated()//用户访问所有地址都必须登录认证后访问.and().formLogin().permitAll();//开启表单登录}}二、编写WebSocket 配置
@Configuration@EnableWebSocketMessageBrokerpublicclassWebSocketConfigimplementsWebSocketMessageBrokerConfigurer{@OverridepublicvoidconfigureMessageBroker(MessageBrokerRegistryconfig){//设置消息代理的前缀,如果消息的前缀为"/queue",就会将消息转发给消息代理(broker)//再由消息代理广播给当前连接的客户端//也可设置多个broker,如:config.enableSimpleBroker("/topic","/queue");config.enableSimpleBroker("/queue");//下面方法可以配置一个或多个前缀,通过这些前缀过滤出需要被注解方法处理的消息。//例如这里表示前缀为"/app"的destination可以通过@MessageMapping注解的方法处理//而其他destination(例如"/topic""/queue")将被直接交给broker处理config.setApplicationDestinationPrefixes("/app");}@OverridepublicvoidregisterStompEndpoints(StompEndpointRegistryregistry){//定义一个前缀为"/chart"的endpoint,并开启sockjs支持。//sockjs可以解决浏览器对WebSocket的兼容性问题,客户端将通过这里配置的URL建立WebSocket连接registry.addEndpoint("/chat").withSockJS();}}三、编写案例代码
1、编写实体
@DatapublicclassChat{//消息的目标用户privateStringto;//消息的来源用户privateStringfrom;//消息的主体内容privateStringcontent;}2、编写Controller
@ControllerpublicclassDemoController{@AutowiredSimpMessagingTemplatemessagingTemplate;//处理来自"/app/chat"路径的消息@MessageMapping("/chat")publicvoidchat(Principalprincipal,Chatchat){//获取当前登录用户的用户名Stringfrom=principal.getName();//将用户设置给chat对象的from属性chat.setFrom(from);//再将消息发送出去,发送的目标用户就是chat对象的to属性值messagingTemplate.convertAndSendToUser(chat.getTo(),"/queue/chat",chat);}}四、编写页面
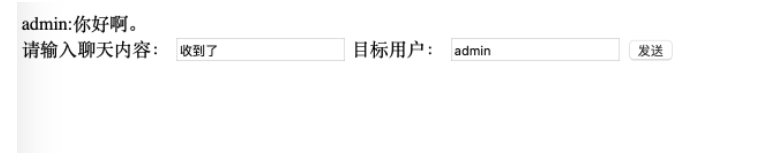
在 resources/static 目录下创建 chat2.html 页面作为点对点的聊天页面。
连接成功后,订阅的地址为“/user/queue/chat”,该地址比服务端配置的地址多了“/user”前缀,这是因为 SimpMessagingTemplate 类中自动添加了路径前缀。
<!DOCTYPEhtml><htmllang="en"><head><metacharset="UTF-8"><title>单聊</title><scriptsrc="https://cdn.bootcdn.net/ajax/libs/jquery/3.3.1/jquery.min.js"></script><scriptsrc="https://cdn.bootcdn.net/ajax/libs/sockjs-client/1.1.2/sockjs.min.js"></script><scriptsrc="https://cdn.bootcdn.net/ajax/libs/stomp.js/2.3.3/stomp.min.js"></script><script>varstompClient=null;//建立一个WebSocket连接functionconnect(){//首先使用SockJS建立连接varsocket=newSockJS('/chat');//然后创建一个STOMP实例发起连接请求stompClient=Stomp.over(socket);//连接成功回调stompClient.connect({},function(frame){//订阅服务端发送回来的消息stompClient.subscribe('/user/queue/chat',function(chat){//将服务端发送回来的消息展示出来showGreeting(JSON.parse(chat.body));});});}//发送消息functionsendMsg(){stompClient.send("/app/chat",{},JSON.stringify({'content':$("#content").val(),'to':$("#to").val()}));}//将服务端发送回来的消息展示出来functionshowGreeting(message){$("#chatsContent").append("<div>"+message.from+":"+message.content+"</div>");}//页面加载后进行初始化动作$(function(){//页面加载完毕后自动连接connect();$("#send").click(function(){sendMsg();});});</script></head><body><divid="chat"><divid="chatsContent"></div><div>请输入聊天内容:<inputtype="text"id="content"placeholder="聊天内容">目标用户:<inputtype="text"id="to"placeholder="目标用户"><buttonid="send"type="button">发送</button></div></div></body></html>五、验证结果
我们使用了 Spring Security 会自动跳转到默认登录页面。
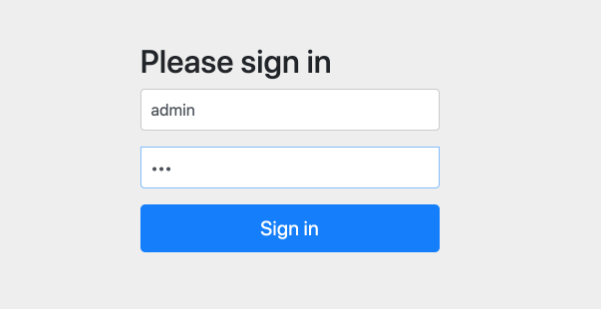
这里我们配置两个用户信息:admin/123,piao/123。

</div> <div class="zixun-tj-product adv-bottom"></div> </div> </div> <div class="prve-next-news">本文:
SpringBoot中怎么使用WebSocket实现点对点消息的详细内容,希望对您有所帮助,信息来源于网络。