怎么在SpringBoot中整合ActiveMQ
导读:本文共2387字符,通常情况下阅读需要8分钟。同时您也可以点击右侧朗读,来听本文内容。按键盘←(左) →(右) 方向键可以翻页。
摘要: 目录结构引入 maven依赖<parent><groupId>org.springframework.boot</groupId><artifactId>spring-boot-starter-parent</artifactId><version>1.5.4.RELEASE</... ...
音频解说
目录
(为您整理了一些要点),点击可以直达。目录结构
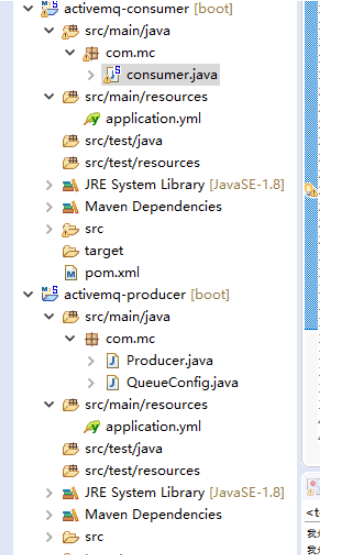
引入 maven依赖
<parent><groupId>org.springframework.boot</groupId><artifactId>spring-boot-starter-parent</artifactId><version>1.5.4.RELEASE</version><relativePath/></parent><properties><project.build.sourceEncoding>UTF-8</project.build.sourceEncoding><project.reporting.outputEncoding>UTF-8</project.reporting.outputEncoding><java.version>1.8</java.version></properties><dependencies><dependency><groupId>org.springframework.boot</groupId><artifactId>spring-boot-starter</artifactId></dependency><dependency><groupId>org.springframework.boot</groupId><artifactId>spring-boot-starter-web</artifactId></dependency><dependency><groupId>org.springframework.boot</groupId><artifactId>spring-boot-starter-test</artifactId><scope>test</scope></dependency><dependency><groupId>org.springframework.boot</groupId><artifactId>spring-boot-starter-activemq</artifactId></dependency></dependencies><build><plugins><plugin><groupId>org.springframework.boot</groupId><artifactId>spring-boot-maven-plugin</artifactId></plugin></plugins></build>
引入 application.yml配置
spring:activemq:broker-url:tcp://127.0.0.1:61616user:adminpassword:adminqueue:springboot-queueserver:port:8080
创建QueueConfig
@ConfigurationpublicclassQueueConfig{@Value("${queue}")privateStringqueue;@BeanpublicQueuelogQueue(){returnnewActiveMQQueue(queue);}@BeanpublicJmsTemplatejmsTemplate(ActiveMQConnectionFactoryactiveMQConnectionFactory,Queuequeue){JmsTemplatejmsTemplate=newJmsTemplate();jmsTemplate.setDeliveryMode(2);//进行持久化配置1表示非持久化,2表示持久化</span>jmsTemplate.setConnectionFactory(activeMQConnectionFactory);jmsTemplate.setDefaultDestination(queue);//此处可不设置默认,在发送消息时也可设置队列jmsTemplate.setSessionAcknowledgeMode(4);//客户端签收模式</span>returnjmsTemplate;}//定义一个消息监听器连接工厂,这里定义的是点对点模式的监听器连接工厂@Bean(name="jmsQueueListener")publicDefaultJmsListenerContainerFactoryjmsQueueListenerContainerFactory(ActiveMQConnectionFactoryactiveMQConnectionFactory){DefaultJmsListenerContainerFactoryfactory=newDefaultJmsListenerContainerFactory();factory.setConnectionFactory(activeMQConnectionFactory);//设置连接数factory.setConcurrency("1-10");//重连间隔时间factory.setRecoveryInterval(1000L);factory.setSessionAcknowledgeMode(4);returnfactory;}}创建生产者:
@SpringBootApplication@Component@EnableSchedulingpublicclassProducer{@AutowiredprivateJmsMessagingTemplatejmsMessagingTemplate;@AutowiredprivateQueuequeue;@Scheduled(fixedDelay=3000)publicvoidsend(){Stringresult=System.currentTimeMillis()+"---测试";System.out.println("result"+result);jmsMessagingTemplate.convertAndSend(queue,result);}publicstaticvoidmain(String[]args){SpringApplication.run(Producer.class,args);}}创建消费者的application.yml
spring:activemq:broker-url:tcp://127.0.0.1:61616user:adminpassword:adminqueue:springboot-queueserver:port:8081
创建消费者:
@Component@SpringBootApplicationpublicclassconsumer{privateintcount=0;@JmsListener(destination="${queue}")publicvoidreceive(TextMessagetextMessage,Sessionsession)throwsJMSException{Stringtext=textMessage.getText();System.out.println("消费:"+text+"第几次获取消息count:"+(++count));System.out.println();StringjmsMessageID=textMessage.getJMSMessageID();}publicstaticvoidmain(String[]args){SpringApplication.run(consumer.class,args);}}结果显示:

</div> <div class="zixun-tj-product adv-bottom"></div> </div> </div> <div class="prve-next-news">本文:
怎么在SpringBoot中整合ActiveMQ的详细内容,希望对您有所帮助,信息来源于网络。