Android app启动节点与上报启动的方法
导读:本文共1745.5字符,通常情况下阅读需要6分钟。同时您也可以点击右侧朗读,来听本文内容。按键盘←(左) →(右) 方向键可以翻页。
摘要: app启动的关键节点经常利用content provider 和Androidx里的 startup库来对库进行初始化操作,那么app启动关键方法的执行顺序是什么样的呢? 怎么样控制我的库的启动顺序?参考这篇文章: Android 多个 ContentProvider 初始化顺序精髓在这张图里:回答上面的问题: 怎么样控制我的库的启动顺序?推荐用contentp... ...
目录
(为您整理了一些要点),点击可以直达。app启动的关键节点
经常利用content provider 和Androidx里的 startup库来对库进行初始化操作,那么app启动关键方法的执行顺序是什么样的呢? 怎么样控制我的库的启动顺序?
参考这篇文章: Android 多个 ContentProvider 初始化顺序
精髓在这张图里:

回答上面的问题: 怎么样控制我的库的启动顺序?
推荐用contentprovider,设置initOrder.
不推荐用startup,因为它只能在dependices()回调里通过依赖来控制,是强依赖,不够灵活

启动时间怎么算
方案1: 参考firebase:
从第一个contentProvider的attachInfo,到第一个页面的onReusme:
app-start-foreground-background-traces:https://firebase.google.com/docs/perf-mon/app-start-foreground-background-traces?authuser=0&platform=android
App start trace
This trace measures the time between when the user opens the app and when the app is responsive. In the console, the trace's name is _app_start. The collected metric for this trace is "duration".
Starts when the app's FirebasePerfProvider ContentProvider completes its onCreate method.
Stops when the first activity's onResume() method is called.
Note that if the app was not cold-started by an activity (for example, by a service or broadcast receiver), no trace is generated.
看一下FirebasePerfProvider的配置:
initOrder="101",基本是最大的. 项目里其他的Provider都没有怎么配置initOrder
<providerandroid:name="com.google.firebase.perf.provider.FirebasePerfProvider"android:authorities="${applicationId}.firebaseperfprovider"android:exported="false"android:initOrder="101"/>可以自己搞个类似的trace打印/上报一下
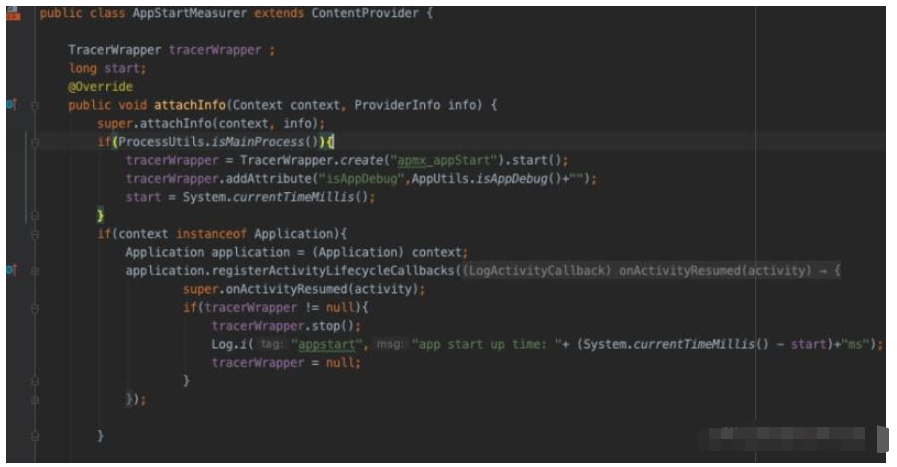
<providerandroid:name="com.xxx.logs.AppStartMeasurer"android:authorities="${applicationId}.AppStartMeasurer"android:exported="false"android:initOrder="102"/>然后就可以看logcat的日志输出+ trace平台的统计了
方案2 : ams
adb 命令:
adbshellamstart-W包名/入口activity全类名
在控制台会输出日志:
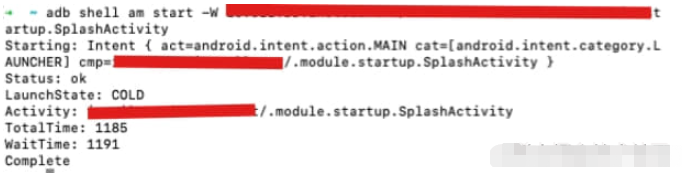
这里的时间会比方案1统计到的时间小一些
</div> <div class="zixun-tj-product adv-bottom"></div> </div> </div> <div class="prve-next-news">Android app启动节点与上报启动的方法的详细内容,希望对您有所帮助,信息来源于网络。