Centos7安装ElasticSearch实例分析
导读:本文共9856.5字符,通常情况下阅读需要33分钟。同时您也可以点击右侧朗读,来听本文内容。按键盘←(左) →(右) 方向键可以翻页。
摘要: 1.下载elasticsearch 6.4.1安装包2.解压压缩包[root@localhostelasticsearch]#tar-zxvfelasticsearch-6.4.1.tar.gz3.启动elasticsearch[root@localhostbin]#./elasticsearch以后台方式启动[root@localhostbin]#./elas... ...
目录
(为您整理了一些要点),点击可以直达。1.下载elasticsearch 6.4.1安装包
2.解压压缩包
[root@localhostelasticsearch]#tar-zxvfelasticsearch-6.4.1.tar.gz
3.启动elasticsearch
[root@localhostbin]#./elasticsearch
以后台方式启动
[root@localhostbin]#./elasticsearch-d
tips:
[root@localhostbin]#./elasticsearch[2018-09-19t19:46:09,817][warn][o.e.b.elasticsearchuncaughtexceptionhandler][]uncaughtexceptioninthread[main]org.elasticsearch.bootstrap.startupexception:java.lang.runtimeexception:cannotrunelasticsearchasrootatorg.elasticsearch.bootstrap.elasticsearch.init(elasticsearch.java:140)~[elasticsearch-6.4.1.jar:6.4.1]atorg.elasticsearch.bootstrap.elasticsearch.execute(elasticsearch.java:127)~[elasticsearch-6.4.1.jar:6.4.1]atorg.elasticsearch.cli.environmentawarecommand.execute(environmentawarecommand.java:86)~[elasticsearch-6.4.1.jar:6.4.1]atorg.elasticsearch.cli.command.mainwithouterrorhandling(command.java:124)~[elasticsearch-cli-6.4.1.jar:6.4.1]atorg.elasticsearch.cli.command.main(command.java:90)~[elasticsearch-cli-6.4.1.jar:6.4.1]atorg.elasticsearch.bootstrap.elasticsearch.main(elasticsearch.java:93)~[elasticsearch-6.4.1.jar:6.4.1]atorg.elasticsearch.bootstrap.elasticsearch.main(elasticsearch.java:86)~[elasticsearch-6.4.1.jar:6.4.1]causedby:java.lang.runtimeexception:cannotrunelasticsearchasrootatorg.elasticsearch.bootstrap.bootstrap.initializenatives(bootstrap.java:104)~[elasticsearch-6.4.1.jar:6.4.1]atorg.elasticsearch.bootstrap.bootstrap.setup(bootstrap.java:171)~[elasticsearch-6.4.1.jar:6.4.1]atorg.elasticsearch.bootstrap.bootstrap.init(bootstrap.java:326)~[elasticsearch-6.4.1.jar:6.4.1]atorg.elasticsearch.bootstrap.elasticsearch.init(elasticsearch.java:136)~[elasticsearch-6.4.1.jar:6.4.1]
elasticsearch 不能以root用户角色启动,因此需要将安装目录授权给其他用户,用其他用户来启动
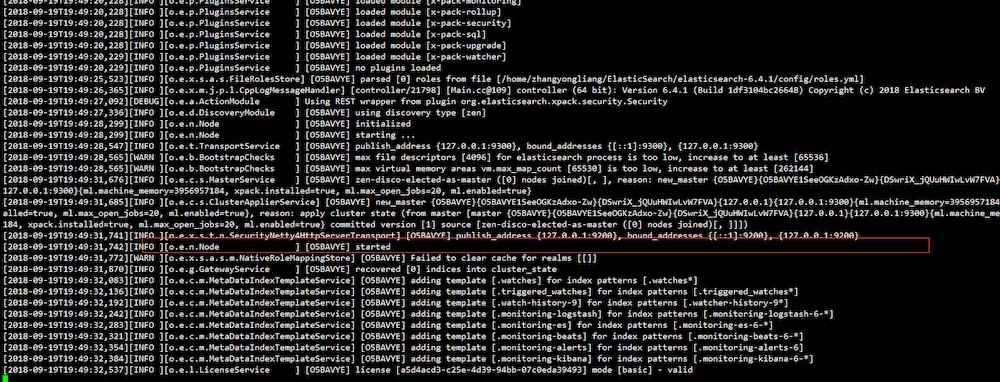
启动成功后,验证,打开新的终端,执行如下命令:
[root@localhost~]#curl'http://localhost:9200/?pretty'{"name":"o5bavye","cluster_name":"elasticsearch","cluster_uuid":"rw1yjlzksgodxkuvgixmxg","version":{"number":"6.4.1","build_flavor":"default","build_type":"tar","build_hash":"e36acdb","build_date":"2018-09-13t22:18:07.696808z","build_snapshot":false,"lucene_version":"7.4.0","minimum_wire_compatibility_version":"5.6.0","minimum_index_compatibility_version":"5.0.0"},"tagline":"youknow,forsearch"}[root@localhost~]#返回信息则表示安装成功!
4.安装kibana
sense 是一个 kibana 应用 它提供交互式的控制台,通过你的浏览器直接向 elasticsearch 提交请求。 这本书的在线版本包含有一个 view in sense 的链接,里面有许多代码示例。当点击的时候,它会打开一个代码示例的sense控制台。 你不必安装 sense,但是它允许你在本地的 elasticsearch 集群上测试示例代码,从而使本书更具有交互性。
下载kibana
kibana是一个为 elasticsearch 提供的数据分析的 web 接口。可使用它对日志进行高效的搜索、可视化、分析等各种操作
下载完成解压kibana
[root@localhostelasticsearch]#tar-zxvfkibana-6.4.1-linux-x86_64.tar.gz
修改 配置config目录下的kibana.yml 文件,配置elasticsearch地址和kibana地址信息
server.host:"192.168.92.50"#kibana服务器地址elasticsearch.url:"http://192.168.92.50:9200"#es地址
启动 kibana
[root@localhostbin]#./kibana
安装kibana本机访问:http://localhost:5601/
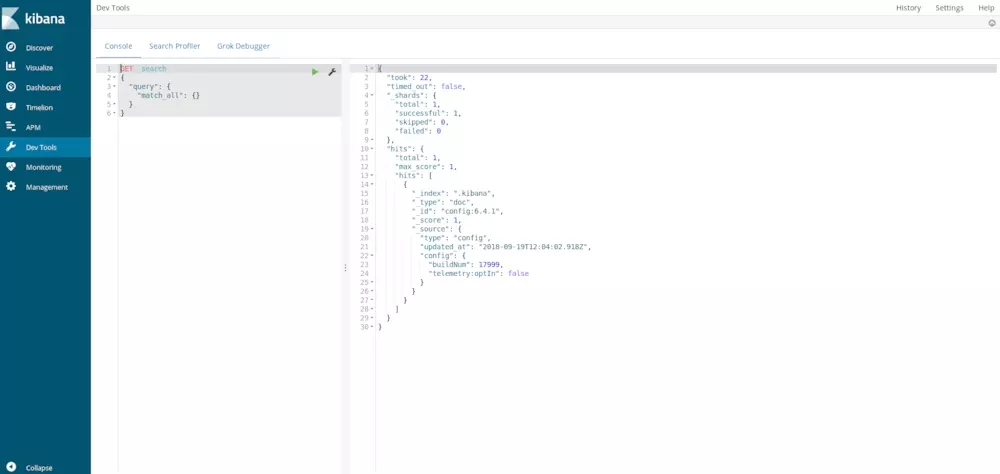
选择dev tools菜单,即可实现可视化请求
5.安装logstash
下载logstash
下载完成解压后,config目录下配置日志收集日志配置文件 logstash.conf
#samplelogstashconfigurationforcreatingasimple#beats->logstash->elasticsearchpipeline.input{tcp{mode=>"server"host=>"192.168.92.50"port=>4560codec=>json_lines}}output{elasticsearch{hosts=>"192.168.92.50:9200"index=>"springboot-logstash-%{+yyyy.mm.dd}"}}配置成功后启动logstatsh
[root@localhostbin]#./logstash-f../config/logstash.conf
es 一些基础知识:
索引(名词):
如前所述,一个 索引 类似于传统关系数据库中的一个 数据库 ,是一个存储关系型文档的地方。 索引 (index) 的复数词为 indices 或 indexes 。
索引(动词):
索引一个文档 就是存储一个文档到一个 索引 (名词)中以便它可以被检索和查询到。这非常类似于 sql 语句中的 insert 关键词,除了文档已存在时新文档会替换旧文档情况之外。
倒排索引:
关系型数据库通过增加一个 索引 比如一个 b树(b-tree)索引 到指定的列上,以便提升数据检索速度。elasticsearch 和 lucene 使用了一个叫做 倒排索引 的结构来达到相同的目的。
put/megacorp/employee/1{"first_name":"john","last_name":"smith","age":25,"about":"ilovetogorockclimbing","interests":["sports","music"]}返回结果:
#!deprecation:thedefaultnumberofshardswillchangefrom[5]to[1]in7.0.0;ifyouwishtocontinueusingthedefaultof[5]shards,youmustmanagethisonthecreateindexrequestorwithanindextemplate{"_index":"megacorp","_type":"employee","_id":"1","_version":1,"result":"created","_shards":{"total":2,"successful":1,"failed":0},"_seq_no":0,"_primary_term":1}路径 /megacorp/employee/1 包含了三部分的信息:
megacorp 索引名称
employee 类型名称
1 特定雇员的id
放置第二个雇员信息:
{"_index":"megacorp","_type":"employee","_id":"2","_version":1,"result":"created","_shards":{"total":2,"successful":1,"failed":0},"_seq_no":0,"_primary_term":1}返回结果:
{"_index":"megacorp","_type":"employee","_id":"2","_version":1,"result":"created","_shards":{"total":2,"successful":1,"failed":0},"_seq_no":0,"_primary_term":1}放置第三个雇员信息
{"_index":"megacorp","_type":"employee","_id":"3","_version":1,"result":"created","_shards":{"total":2,"successful":1,"failed":0},"_seq_no":0,"_primary_term":1}5.检索文档
检索到单个雇员的数据
get /megacorp/employee/1
返回结果:
{"_index":"megacorp","_type":"employee","_id":"1","_version":1,"found":true,"_source":{"first_name":"john","last_name":"smith","age":25,"about":"ilovetogorockclimbing","interests":["sports","music"]}}6.轻量搜索
一个 get 是相当简单的,可以直接得到指定的文档。 现在尝试点儿稍微高级的功能,比如一个简单的搜索!
第一个尝试的几乎是最简单的搜索了。我们使用下列请求来搜索所有雇员:
get /megacorp/employee/_search
返回结果:
{"took":31,"timed_out":false,"_shards":{"total":5,"successful":5,"skipped":0,"failed":0},"hits":{"total":3,"max_score":1,"hits":[{"_index":"megacorp","_type":"employee","_id":"2","_score":1,"_source":{"first_name":"jane","last_name":"smith","age":32,"about":"iliketocollectrockalbums","interests":["music"]}},{"_index":"megacorp","_type":"employee","_id":"1","_score":1,"_source":{"first_name":"john","last_name":"smith","age":25,"about":"ilovetogorockclimbing","interests":["sports","music"]}},{"_index":"megacorp","_type":"employee","_id":"3","_score":1,"_source":{"first_name":"douglas","last_name":"fir","age":35,"about":"iliketobuildcabinets","interests":["forestry"]}}]}}通过姓名模糊匹配来获得结果
get /megacorp/employee/_search?q=last_name:smith
返回结果:
{"took":414,"timed_out":false,"_shards":{"total":5,"successful":5,"skipped":0,"failed":0},"hits":{"total":2,"max_score":0.2876821,"hits":[{"_index":"megacorp","_type":"employee","_id":"2","_score":0.2876821,"_source":{"first_name":"jane","last_name":"smith","age":32,"about":"iliketocollectrockalbums","interests":["music"]}},{"_index":"megacorp","_type":"employee","_id":"1","_score":0.2876821,"_source":{"first_name":"john","last_name":"smith","age":25,"about":"ilovetogorockclimbing","interests":["sports","music"]}}]}}7.使用查询表达式搜索
领域特定语言 (dsl), 指定了使用一个 json 请求
get/megacorp/employee/_search{"query":{"match":{"last_name":"smith"}}}返回结果:
{"took":7,"timed_out":false,"_shards":{"total":5,"successful":5,"skipped":0,"failed":0},"hits":{"total":2,"max_score":0.2876821,"hits":[{"_index":"megacorp","_type":"employee","_id":"2","_score":0.2876821,"_source":{"first_name":"jane","last_name":"smith","age":32,"about":"iliketocollectrockalbums","interests":["music"]}},{"_index":"megacorp","_type":"employee","_id":"1","_score":0.2876821,"_source":{"first_name":"john","last_name":"smith","age":25,"about":"ilovetogorockclimbing","interests":["sports","music"]}}]}}8.更复杂的搜索
搜索姓氏为 smith 的雇员,但这次我们只需要年龄大于 30 的,使用过滤器 filter ,它支持高效地执行一个结构化查询
get/megacorp/employee/_search{"query":{"bool":{"must":{"match":{"last_name":"smith"}},"filter":{"range":{"age":{"gt":30}}}}}}其中:range 过滤器 , 它能找到年龄大于 30 的文档,其中 gt 表示_大于(_great than)
返回结果:
{"took":44,"timed_out":false,"_shards":{"total":5,"successful":5,"skipped":0,"failed":0},"hits":{"total":1,"max_score":0.2876821,"hits":[{"_index":"megacorp","_type":"employee","_id":"2","_score":0.2876821,"_source":{"first_name":"jane","last_name":"smith","age":32,"about":"iliketocollectrockalbums","interests":["music"]}}]}}9.全文搜索
搜索下所有喜欢攀岩(rock climbing)的雇员
get/megacorp/employee/_search{"query":{"match":{"about":"rockclimbing"}}}返回结果:
{"took":17,"timed_out":false,"_shards":{"total":5,"successful":5,"skipped":0,"failed":0},"hits":{"total":2,"max_score":0.5753642,"hits":[{"_index":"megacorp","_type":"employee","_id":"1","_score":0.5753642,"_source":{"first_name":"john","last_name":"smith","age":25,"about":"ilovetogorockclimbing","interests":["sports","music"]}},{"_index":"megacorp","_type":"employee","_id":"2","_score":0.2876821,"_source":{"first_name":"jane","last_name":"smith","age":32,"about":"iliketocollectrockalbums","interests":["music"]}}]}}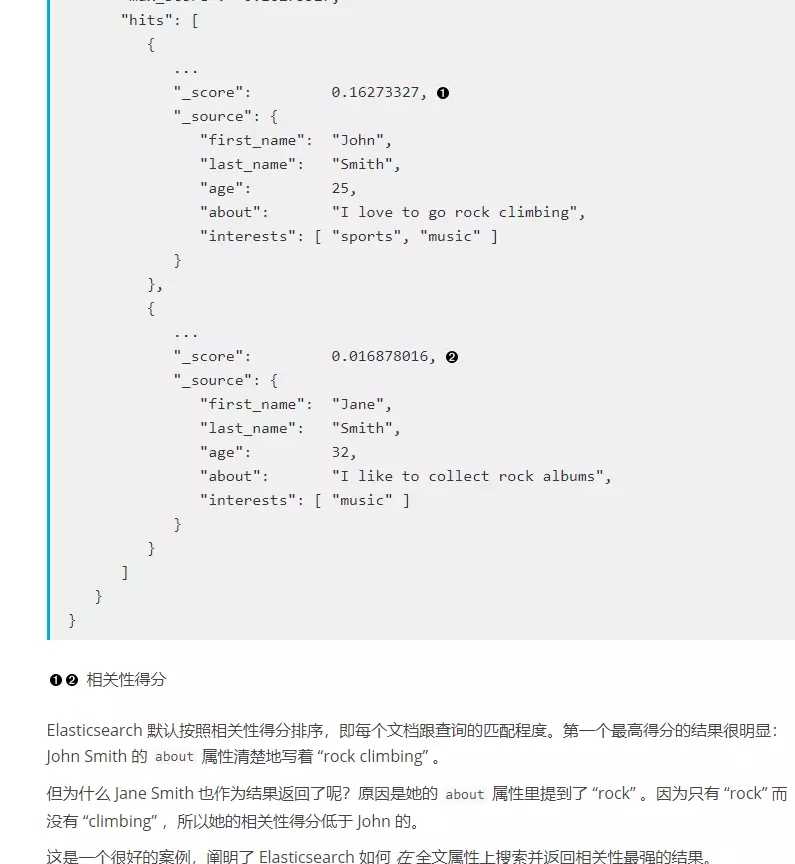
10.全文搜索
找出一个属性中的独立单词是没有问题的,但有时候想要精确匹配一系列单词或者短语 。 比如, 我们想执行这样一个查询,仅匹配同时包含 “rock” 和 “climbing” ,并且 二者以短语 “rock climbing” 的形式紧挨着的雇员记录。
get/megacorp/employee/_search{"query":{"match_phrase":{"about":"rockclimbing"}}}返回结果:
{"took":142,"timed_out":false,"_shards":{"total":5,"successful":5,"skipped":0,"failed":0},"hits":{"total":1,"max_score":0.5753642,"hits":[{"_index":"megacorp","_type":"employee","_id":"1","_score":0.5753642,"_source":{"first_name":"john","last_name":"smith","age":25,"about":"ilovetogorockclimbing","interests":["sports","music"]}}]}}11.高亮搜索
许多应用都倾向于在每个搜索结果中 高亮 部分文本片段,以便让用户知道为何该文档符合查询条件。在 elasticsearch 中检索出高亮片段也很容易。
增加参数: highlight
get/megacorp/employee/_search{"query":{"match_phrase":{"about":"rockclimbing"}},"highlight":{"fields":{"about":{}}}}返回结果:
{"took":250,"timed_out":false,"_shards":{"total":5,"successful":5,"skipped":0,"failed":0},"hits":{"total":1,"max_score":0.5753642,"hits":[{"_index":"megacorp","_type":"employee","_id":"1","_score":0.5753642,"_source":{"first_name":"john","last_name":"smith","age":25,"about":"ilovetogorockclimbing","interests":["sports","music"]},"highlight":{"about":["ilovetogo<em>rock</em><em>climbing</em>"]}}]}}其中高亮模块为highlight属性
12.分析
elasticsearch 有一个功能叫聚合(aggregations),允许我们基于数据生成一些精细的分析结果。聚合与 sql 中的 group by 类似但更强大。
举个例子,挖掘出雇员中最受欢迎的兴趣爱好:
get/megacorp/employee/_search{"aggs":{"all_interests":{"terms":{"field":"interests"}}}}返回结果:
{..."hits":{...},"aggregations":{"all_interests":{"buckets":[{"key":"music","doc_count":2},{"key":"forestry","doc_count":1},{"key":"sports","doc_count":1}]}}} </div> <div class="zixun-tj-product adv-bottom"></div> </div> </div> <div class="prve-next-news">Centos7安装ElasticSearch实例分析的详细内容,希望对您有所帮助,信息来源于网络。