JS如何实现可移动模态框
导读:本文共3054.5字符,通常情况下阅读需要10分钟。同时您也可以点击右侧朗读,来听本文内容。按键盘←(左) →(右) 方向键可以翻页。
摘要: 点击增加弹出模态框。这个模态框可以移动的。由于我写的项目是egg.js前后端分离,需要获取数据库内容,所以以下代码中的{{uh.username}}自己根据实际情况进行修改。1.首先在前端页面中添加以下代码:<divclass="content-top"><buttontype="submit"clas... ...
音频解说
目录
(为您整理了一些要点),点击可以直达。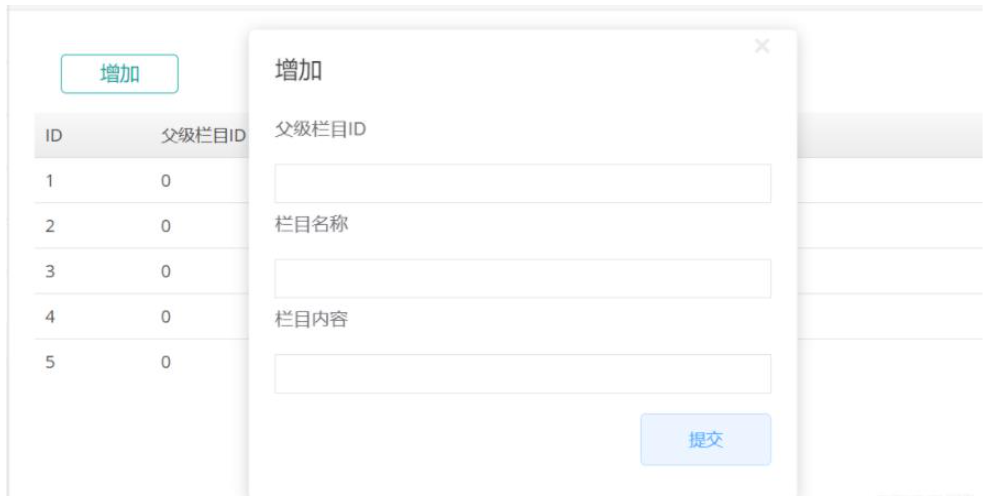
点击增加弹出模态框。
这个模态框可以移动的。
由于我写的项目是egg.js前后端分离,需要获取数据库内容,所以以下代码中的{{uh.username}}自己根据实际情况进行修改。
1.首先在前端页面中添加以下代码:
<divclass="content-top"><buttontype="submit"class="open">增加</button></div><divclass="model-box"><divclass="content"><divclass="title"><span>增加</span><iclass="close">×</i></div><formmethod="POST"action="/add"><divclass="form-input"><labelfor="username">用户名</label><inputtype="text"name="username"value={{uh.username}}>{{uh.username}}</div><divclass="form-input"><labelfor="username">密码</label><inputtype="password"name="password"value={{uh.password}}>{{uh.password}}</div><divclass="form-input"><buttontype="submit">提交</button></div></form></div></div>2.css样式
*{padding:0;margin:0;}.content-topbutton{/*取消按钮自带的轮廓*/outline:0;width:100px;height:40px;color:#409eff;/*圆角属性*/border-radius:4px;border:1pxsolid#b3d8ff;background-color:#ecf5ff;/*过渡*/transition:all0.3s;cursor:pointer;}.content-topbutton:hover{color:#fff;border-color:#409eff;background-color:#409eff;}.model-boxbutton{/*取消按钮自带的轮廓*/outline:0;width:100px;height:40px;color:#409eff;/*圆角属性*/border-radius:4px;border:1pxsolid#b3d8ff;background-color:#ecf5ff;/*过渡*/transition:all0.3s;/*鼠标变小手*/cursor:pointer;}.model-boxbutton:hover{color:#fff;border-color:#409eff;background-color:#409eff;}/*模态框start*/.model-box{/*隐藏模态框*/display:none;position:fixed;top:50px;left:80px;width:100%;}.model-box.content{position:absolute;top:5px;/*calc方法可以自动计算数值*/left:calc(50%-210px);width:420px;border-radius:5px;padding:020px;/*盒子阴影*/box-shadow:02px12pxrgba(0,0,0,0.2);background-color:#fff;}.model-box.content.title{/*弹性布局*/display:flex;/*让子元素水平与两端对齐*/justify-content:space-between;height:60px;line-height:60px;/*鼠标移入呈现移动光标*/cursor:move;}.model-box.content.titlespan{font-size:18px;color:#333;}.model-box.content.titlei{/*i标签默认是斜体这个属性可以变正*/font-style:normal;font-size:24px;color:#909399;cursor:pointer;}/*鼠标移入变色*/.model-box.content.titlei:hover{color:#409eff;}.model-box.contentform.form-input{margin:5px0;}/*因为label元素的for属性和input元素id属性设置了相同的属性值所以就可以通过label元素选中输入框布局已完成*/.model-box.contentform.form-inputlabel{font-size:14px;color:#606266;cursor:pointer;}.model-box.contentform.form-inputinput{/*取消输入框默认的轮廓*/outline:0;width:100%;height:30px;padding:08px;margin-top:12px;border:1pxsolid#dcdfe6;border-radius:4px;}.model-box.contentform.form-inputinput:hover{border-color:#c0c4cc;}/*输入框获取焦点变色*/.model-box.contentform.form-inputinput:focus{border-color:#409eff;}.model-box.contentform.form-inputbutton{/*让按钮浮动到右侧*/float:right;margin-top:10px;}3.js部分
//添加页面加载事件window.addEventListener("load",()=>{//获取打开按钮constopen=document.querySelector(".open");//获取关闭按钮constclose=document.querySelector(".close");//获取整个大的模态框constfillScreen=document.querySelector(".model-box");//获取模态框可移动的头部区域constheader=document.querySelector(".title");//获取模态框珠主区域constmodelBox=document.querySelector(".content");//element.addEventListener()方法为指定元素添加事件句柄//打开功能if(open){open.addEventListener("click",()=>{//点击打开按钮改变display属性值fillScreen.style.display="block";});}//关闭功能if(close){close.addEventListener("click",()=>{fillScreen.style.display="none";});}//移动功能为header添加鼠标按下事件if(header){header.addEventListener("mousedown",(event)=>{//让模态框移动需要知道鼠标在header区域的光标位置计算方式是先算出鼠标光标在整个浏览器区域的位置再算出模态框距离浏览器边缘位置的大小相减//event.pageX可以获取鼠标光标距离浏览器边缘位置的大小//modelBox.offsetLeft可以获取到模态框区里浏览器左边框的距离constx=event.pageX-modelBox.offsetLeft;consty=event.pageY-modelBox.offsetTop;console.log(x,y);//在按下事件内添加移动事件document.addEventListener("mousemove",move);//做鼠标弹起事件functionmove(event){//算出移动时的模态框的位置距离并赋值原理和上面求x,y一样//css属性值需要单位modelBox.style.left=event.pageX-x+"px";modelBox.style.top=event.pageY-y+"px";}//onmouseup当松开鼠标按钮时运行脚本removeEventListener移除由addEventListener()方法添加的"mousemove"事件document.addEventListener("mouseup",()=>{document.removeEventListener("mousemove",move);});});}}); </div> <div class="zixun-tj-product adv-bottom"></div> </div> </div> <div class="prve-next-news">本文:
JS如何实现可移动模态框的详细内容,希望对您有所帮助,信息来源于网络。