go-zero单体服务使用泛型简化注册Handler路由的问题怎么解决
导读:本文共7399.5字符,通常情况下阅读需要25分钟。同时您也可以点击右侧朗读,来听本文内容。按键盘←(左) →(右) 方向键可以翻页。
摘要: 一、Golang环境安装及配置Go Modulemac OS安装Go#下载并安装Go for Mac验证安装结果$goversiongoversiongo1.15.1darwin/amd64linux 安装Go#下载Go for Linux解压压缩包至/usr/local$tar-C/usr/local-xzfgo1.15.8.linux-amd64.tar.... ...
目录
(为您整理了一些要点),点击可以直达。一、Golang环境安装及配置Go Module
mac OS安装Go#
下载并安装Go for Mac
验证安装结果
$goversiongoversiongo1.15.1darwin/amd64
linux 安装Go#
下载Go for Linux
解压压缩包至/usr/local
$tar-C/usr/local-xzfgo1.15.8.linux-amd64.tar.gz
添加/usr/local/go/bin到环境变量
$$HOME/.profile$exportPATH=$PATH:/usr/local/go/bin$source$HOME/.profile
验证安装结果
$goversiongoversiongo1.15.1linux/amd64
Windows安装Go#
下载并安装Go for Windows验证安装结果
$goversiongoversiongo1.15.1windows/amd64
MODULE配置
Go Module是Golang管理依赖性的方式,像Java中的Maven,Android中的Gradle类似。
查看GO111MODULE开启情况
$goenvGO111MODULEon
开启GO111MODULE,如果已开启(即执行go env GO111MODULE结果为on)请跳过。
$goenv-wGO111MODULE="on"
设置GOPROXY
$goenv-wGOPROXY=https://goproxy.cn
设置GOMODCACHE
查看GOMODCACHE
$goenvGOMODCACHE
如果目录不为空或者/dev/null,请跳过。
goenv-wGOMODCACHE=$GOPATH/pkg/mod
二、Goctl 安装
Goctl在go-zero项目开发着有着很大的作用,其可以有效的帮助开发者大大提高开发效率,减少代码的出错率,缩短业务开发的工作量,更多的Goctl的介绍请阅读Goctl介绍
安装(mac&linux)
###Go1.15及之前版本GO111MODULE=onGOPROXY=https://goproxy.cn/,directgoget-ugithub.com/zeromicro/go-zero/tools/goctl@latest###Go1.16及以后版本GOPROXY=https://goproxy.cn/,directgoinstallgithub.com/zeromicro/go-zero/tools/goctl@latest
安装(windows)
goinstallgithub.com/zeromicro/go-zero/tools/goctl@latest
环境变量检测(mac&linux)
go get 下载编译后的二进制文件位于 \$GOPATH/bin 目录下,要确保 $GOPATH/bin已经添加到环境变量。
sudovim/etc/paths//添加环境变量
在最后一行添加如下内容 //$GOPATH 为你本机上的文件地址
$GOPATH/bin
安装结果验证
$goctl-vgoctlversion1.1.4darwin/amd64
二、初始化go-zero
快速生成 api 服务
goctlapinewgreetcdgreetgomodinitgomodtidygorungreet.go-fetc/greet-api.yaml
默认侦听在 8888 端口
侦听端口可以在greet-api.yaml配置文件里修改,此时,可以通过 curl 请求,或者直接在浏览器中打开http://localhost:8888/from/you
$curl-ihttp://localhost:8888/from/youHTTP/1.1200OKContent-Type:application/json;charset=utf-8Traceparent:00-45fa9e7a7c505bad3a53a024e425ace9-eb5787234cf3e308-00Date:Thu,22Oct202014:03:18GMTContent-Length:14null
greet服务的目录结构
$treegreetgreet├──etc│└──greet-api.yaml├──greet.api├──greet.go└──internal├──config│└──config.go├──handler│├──greethandler.go│└──routes.go├──logic│└──greetlogic.go├──svc│└──servicecontext.go└──types└──types.go
三、查看注册Handler路由流程greet.go
varconfigFile=flag.String("f","etc/greet-api.yaml","theconfigfile")funcmain(){ flag.Parse() varcconfig.Config conf.MustLoad(*configFile,&c) server:=rest.MustNewServer(c.RestConf) deferserver.Stop()//上面的都是加载配置什么的 ctx:=svc.NewServiceContext(c) handler.RegisterHandlers(server,ctx)//此方法是注册路由和路由映射Handler,重点在这里 fmt.Printf("Startingserverat%s:%d...\n",c.Host,c.Port) server.Start()}RegisterHandlers在internal\handler\routes.go中
funcRegisterHandlers(server*rest.Server,serverCtx*svc.ServiceContext){server.AddRoutes(//往rest.Server中添加路由 []rest.Route{//路由数组 { Method:http.MethodGet, Path:"/from/:name",//路由 Handler:GreetHandler(serverCtx),//当前路由的处理Handler }, },)}GreetHandler在internal\handler\greethandler.go中
funcGreetHandler(ctx*svc.ServiceContext)http.HandlerFunc{ returnfunc(whttp.ResponseWriter,r*http.Request){ varreqtypes.Request iferr:=httpx.Parse(r,&req);err!=nil{//请求的错误判断,这个可以不用管 httpx.Error(w,err) return } l:=logic.NewGreetLogic(r.Context(),ctx)//GreetHandler处理函数将请求转发到了GreetLogic中,调用NewGreetLogic进行结构体的初始化 resp,err:=l.Greet(req)//然后调用Greet来进行处理请求,所以我们在GreetLogic.Greet方法中可以看到一句话//todo:addyourlogichereanddeletethisline iferr!=nil{ httpx.Error(w,err) }else{ httpx.OkJson(w,resp) } }}四、对注册Handler路由进行简化
项目文件的增加
在路由注册时,我们如果服务越加越多,那么相对应的func xxxxHandler(ctx *svc.ServiceContext) http.HandlerFunc就要进行多次的添加,并且这个方法体内部1到5行是属于额外的重复添加
例如:我们添加一个customlogic.go
按照命名的正确和规范性,需要在internal\logic目录下添加customlogic.go文件,然后在internal\handler目录下添加customhandler.go文件,并且两个文件都添加相对应的结构体和函数等,最后在routes.go中再添加一次
{Method:http.MethodGet,Path:"/custom/:name",Handler:CustomHandler(serverCtx),},此时,我们的文件结构应该是这样
greet├──etc│└──greet-api.yaml├──greet.api├──greet.go└──internal├──config│└──config.go├──handler│├──greethandler.go│├──customhandler.go│├──...│└──routes.go├──logic│├──greetlogic.go│├──...│└──customlogic.go├──svc│└──servicecontext.go└──types└──types.go
当单体应用达到一定的数量级,handler和logic文件夹下将会同步增加很多的文件
引入泛型概念
自Go1.18开始,go开始使用泛型,泛型的广泛定义 :是一种把明确类型的工作推迟到创建对象或者调用方法的时候才去明确的特殊的类型。 也就是说在泛型使用过程中,操作的数据类型被指定为一个参数,而这种参数类型可以用在 类、方法和接口 中,分别被称为 泛型类 、 泛型方法 、 泛型接口 。
我们可以利用泛型,让在添加路由时就要固定死的Handler: GreetHandler(serverCtx)推迟到后面,去根据实际的Logic结构体去判断需要真正执行的logic.NewGreetLogic(r.Context(), ctx)初始化结构体和l.Greet(req)逻辑处理方法
如何去做在internal\logic下添加一个baselogic.go文件,参考Go泛型实战 | 如何在结构体中使用泛型
packagelogicimport( "greet/internal/svc" "greet/internal/types" "net/http")typeBaseLogicinterface{ any Handler(reqtypes.Request,whttp.ResponseWriter,r*http.Request,svcCtx*svc.ServiceContext)//每一个结构体中必须要继承一下Handler方法,例如customlogic.go和greetlogic.go中的Handler方法}typelogic[TBaseLogic]struct{ dataT}funcNew[TBaseLogic]()logic[T]{ c:=logic[T]{} varinsT c.data=ins returnc}func(a*logic[T])LogicHandler(reqtypes.Request,whttp.ResponseWriter,r*http.Request,svcCtx*svc.ServiceContext){//作为一个中转处理方法,最终执行结构体的Handler a.data.Handler(req,w,r,svcCtx)}将greethandler.go文件修改成basehandler.go,注释掉之前的GreetHandler方法
packagehandlerimport( "net/http" "greet/internal/logic" "greet/internal/svc" "greet/internal/types" "github.com/zeromicro/go-zero/rest/httpx")//funcGreetHandler(svcCtx*svc.ServiceContext)http.HandlerFunc{// returnBaseHandlerFunc(svcCtx)// //returnfunc(whttp.ResponseWriter,r*http.Request){// // varreqtypes.Request// // iferr:=httpx.Parse(r,&req);err!=nil{// // httpx.Error(w,err)// // return// // }// // l:=logic.NewGreetLogic(r.Context(),svcCtx)// // resp,err:=l.Greet(&req)// // iferr!=nil{// // httpx.Error(w,err)// // }else{// // httpx.OkJson(w,resp)// // }// //}//}funcBaseHandlerFunc[Tlogic.BaseLogic](svcCtx*svc.ServiceContext,tT)http.HandlerFunc{ returnfunc(whttp.ResponseWriter,r*http.Request){ varreqtypes.Request iferr:=httpx.Parse(r,&req);err!=nil{ httpx.Error(w,err) return } //通过泛型动态调用不同结构体的Handler方法 cc:=logic.New[T]() cc.LogicHandler(req,w,r,svcCtx) }}在internal\logic\greetlogic.go中增加一个Handler方法
packagelogicimport( "context" "net/http" "greet/internal/svc" "greet/internal/types" "github.com/zeromicro/go-zero/core/logx" "github.com/zeromicro/go-zero/rest/httpx")typeGreetLogicstruct{ logx.Logger ctxcontext.Context svcCtx*svc.ServiceContext}funcNewGreetLogic(ctxcontext.Context,svcCtx*svc.ServiceContext)*GreetLogic{ return&GreetLogic{ Logger:logx.WithContext(ctx), ctx:ctx, svcCtx:svcCtx, }}func(aGreetLogic)Handler(reqtypes.Request,whttp.ResponseWriter,r*http.Request,svcCtx*svc.ServiceContext){//新增方法 l:=NewGreetLogic(r.Context(),svcCtx) resp,err:=l.Greet(&req) iferr!=nil{ httpx.Error(w,err) }else{ httpx.OkJson(w,resp) }}func(l*GreetLogic)Greet(req*types.Request)(resp*types.Response,errerror){ //todo:addyourlogichereanddeletethisline response:=new(types.Response) if(*req).Name=="me"{ response.Message="greetLogic:listentome,thankyou." }else{ response.Message="greetLogic:listentoyou,thankme." } returnresponse,nil}然后修改internal\handler\routes.go下面的server.AddRoutes部分
funcRegisterHandlers(server*rest.Server,serverCtx*svc.ServiceContext){server.AddRoutes(//往rest.Server中添加路由 []rest.Route{//路由数组 { Method:http.MethodGet, Path:"/from/:name",//路由 Handler:BaseHandlerFunc(serverCtx,logic.GreetLogic{}), }, },)}现在就大功告成了,我们启动一下
gorungreet.go-fetc/greet-api.yaml
然后在浏览器中请求一下http://localhost:8888/from/you
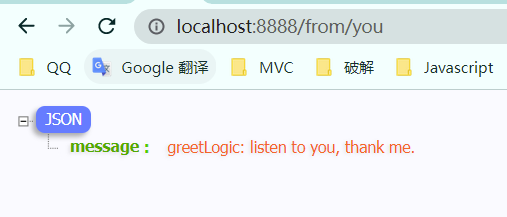
验证一下新增api路由在internal\logic下新增一个customlogic.go文件
packagelogicimport( "context" "net/http" "greet/internal/svc" "greet/internal/types" "github.com/zeromicro/go-zero/core/logx" "github.com/zeromicro/go-zero/rest/httpx")typeCustomLogicstruct{ logx.Logger ctxcontext.Context svcCtx*svc.ServiceContext}funcNewCustomLogic(ctxcontext.Context,svcCtx*svc.ServiceContext)*CustomLogic{ return&CustomLogic{ Logger:logx.WithContext(ctx), ctx:ctx, svcCtx:svcCtx, }}func(aCustomLogic)Handler(reqtypes.Request,whttp.ResponseWriter,r*http.Request,svcCtx*svc.ServiceContext){ l:=NewCustomLogic(r.Context(),svcCtx) resp,err:=l.Custom(&req) iferr!=nil{ httpx.Error(w,err) }else{ httpx.OkJson(w,resp) }}func(l*CustomLogic)Custom(req*types.Request)(resp*types.Response,errerror){//response.Message稍微修改了一下,便于区分 //todo:addyourlogichereanddeletethisline response:=new(types.Response) if(*req).Name=="me"{ response.Message="customLogic:listentome,thankyou." }else{ response.Message="customLogic:listentoyou,thankme." } returnresponse,nil}然后修改internal\handler\routes.go
funcRegisterHandlers(server*rest.Server,serverCtx*svc.ServiceContext){server.AddRoutes(//往rest.Server中添加路由 []rest.Route{//路由数组 { Method:http.MethodGet, Path:"/from/:name",//路由 Handler:BaseHandlerFunc(serverCtx,logic.GreetLogic{}), },{ Method:http.MethodGet, Path:"/to/:name",//路由 Handler:BaseHandlerFunc(serverCtx,logic.CustomLogic{}), }, },)}其他地方不需要修改
我们启动一下
gorungreet.go-fetc/greet-api.yaml
然后在浏览器中请求一下http://localhost:8888/from/you、http://localhost:8888/to/you、http://localhost:8888/too/you
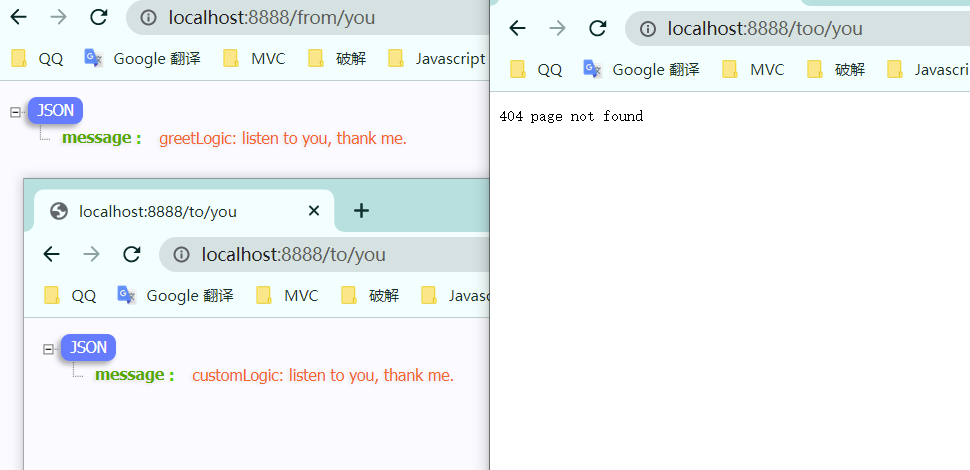
现在,在添加新的logic做路由映射时,就可以直接简化掉添加xxxxhandler.go文件了,实际上是将这个Handler移动到了xxxxlogic.go中。
</div> <div class="zixun-tj-product adv-bottom"></div> </div> </div> <div class="prve-next-news">go-zero单体服务使用泛型简化注册Handler路由的问题怎么解决的详细内容,希望对您有所帮助,信息来源于网络。