Android如何实现图片裁剪和上传
导读:本文共4026.5字符,通常情况下阅读需要13分钟。同时您也可以点击右侧朗读,来听本文内容。按键盘←(左) →(右) 方向键可以翻页。
摘要:!!!Fragment中使用uCrop必须这样,否则Fragment的onActivityResult接收不到回调uCrop.start(mActivityContext,this);}4、在上次的Activity方法中调用裁剪的方法publicclassUserFragmentextendsFragment{privatestaticfinalintIMAGE_REQUEST_CODE=1... ...
目录
(为您整理了一些要点),点击可以直达。!!!Fragment中使用uCrop必须这样,否则Fragment的onActivityResult接收不到回调
uCrop.start(mActivityContext,this);
}
4、在上次的Activity方法中调用裁剪的方法
publicclassUserFragmentextendsFragment{privatestaticfinalintIMAGE_REQUEST_CODE=100;
privatestaticfinalintIMAGE_REQUEST_CODE_GE7=101;
privatestaticfinalintCAMERA_REQUEST_CODE=104;
privatestaticfinalintREQUEST_EXTERNAL_STORAGE_CODE=200;
privateActivitymActivityContext;//获取上下文
privateMyApplicationmyApplication;//获取myApplication中的BestLogin对象
privateBestLoginmember;//用户对象
privateFilemGalleryFile;//存放图库选择是返回的图片
privateFilemCameraFile;//存放相机的图片
privateFilemCropFile;//存放图像裁剪的图片
privateLoadingDialogloadingDialog;//加载层
//注意:这个方法里面有些代码是上次的系统调用相机的,请留意和上次代码是否有重复
@Override
publicvoidonActivityResult(intrequestCode,intresultCode,@NullableIntentdata){
super.onActivityResult(requestCode,resultCode,data);
if(resultCode==Activity.RESULT_OK&&(data!=null||requestCode==CAMERA_REQUEST_CODE)){
switch(requestCode){
caseIMAGE_REQUEST_CODE://版本<7.0图库返回
//获取图片的全路径
Uriuri=data.getData();
Log.e("ImagUri",uri.getPath());
//进行图像裁剪这里需要调用图片裁剪的方法
startPhotoZoom(uri);
break;
caseIMAGE_REQUEST_CODE_GE7://版本>=7.0图库返回
//获取文件路径
StringstrPath=GetImagePath.getPath(mActivityContext,data.getData());
if(Tools.isNotNull(strPath)){
FileimgFile=newFile(strPath);
//通过FileProvider创建一个content类型的Uri
UridataUri=FileProvider.getUriForFile(mActivityContext,"com.gx.reservation.fileprovider",imgFile);
Log.e("ImagUri",dataUri.getPath());
//进行图像裁剪这里需要调用图片裁剪的方法
startPhotoZoom(dataUri);
}else{
Toast.makeText(mActivityContext,"选择图片失败",Toast.LENGTH_SHORT).show();
}
break;
//这个还算比较重要的代码
caseCAMERA_REQUEST_CODE://相机的返回
UriinputUrl;
if(Build.VERSION.SDK_INT>=Build.VERSION_CODES.N){
//Android7.0及以上
//通过FileProvider创建一个content类型的UriinputUrl=FileProvider.getUriForFile(mActivityContext,"com.gx.reservation.fileprovider",mCameraFile);
}else{
//Android7.0以下
inputUrl=Uri.fromFile(mCameraFile);
}
//启动图片裁剪
if(inputUrl!=null){
startPhotoZoom(inputUrl);
}
break;
//核心代码,其他的代码上次调用系统的相机都有用到
caseUCrop.REQUEST_CROP://Ucrop裁剪返回
UriresultUri=UCrop.getOutput(data);
if(resultUri!=null){
//uri转文件路径
StringstrPathCrop=GetImagePath.getPath(mActivityContext,resultUri);
if(Tools.isNotNull(strPathCrop)){
FilefileUp=newFile(strPathCrop);
if(fileUp.exists()){
//=====上传文件
Stringurl=ServiceUrls.getMemberMethodUrl("uploadMemberPicture");
//参数map
Map<String,Object>pMap=newHashMap<>();
pMap.put("memberId",myApplication.getBestlogin().getLoginid());
//文件map
Map<String,File>fileMap=newHashMap<>();
fileMap.put("photo",fileUp);
//显示加载层
loadingDialog.setLoadingText("上传中...").show();
//发送请求
OkHttpTool.httpPostWithFile(url,pMap,fileMap,newOkHttpTool.ResponseCallback(){
@Override
publicvoidonResponse(finalbooleanisSuccess,finalintresponseCode,Stringresponse,Exceptionexception){
mActivityContext.runOnUiThread(newRunnable(){
@Override
publicvoidrun(){
//关闭加载层
loadingDialog.close();
StringstrText="网络环境不佳,请稍后再试";
if(isSuccess&&responseCode==200){
try{
JSONObjectjsonObject=newJSONObject(response);
intcode=jsonObject.getInt("code");
strText=jsonObject.getString("text");
if(code==200){
//提示:这里我是用户的信息的修改,所以把修改后的数据设置到BestLogin对象中
StringstrData=jsonObject.getString("data");
BestLoginnewMember=gson.fromJson(strData,BestLogin.class);
if(newMember!=null){myApplication.setBestlogin(newMember);
//重新加载本页面
initView();
}
}
}catch(JSONExceptione){
e.printStackTrace();
}
}
Toast.makeText(mActivityContext,strText,Toast.LENGTH_LONG).show();
}
});
}
});
return;
}
}
}
Toast.makeText(mActivityContext,"图片裁剪失败",Toast.LENGTH_SHORT).show();
break;
}
}else{
Toast.makeText(mActivityContext,"操作失败",Toast.LENGTHSHORT).show();
}
}
5、服务端的上传方法
publicObjectuploadMemberPicture(intmemberId,@RequestParam(value="photo")MultipartFilemPhoto){
JsonReturnjsonReturn=newJsonReturn();
if(!mPhoto.isEmpty()&&mPhoto.getSize()>0){//判断文件是否为空
if(memberId>0){//判断memberid
BestLoginmember=this.appMemberService.selectMemberById(memberId);
if(member!=null){
//获取文件名称
StringfileName=mPhoto.getOriginalFilename();
//获取文件扩展名称
StringstrExt=fileName.substring(fileName.lastIndexOf('.'));
StringphoneName=memberId+""+System.currentTimeMillis()+"_"+System.nanoTime()+strExt;
//保存图片
try{
FileUtils.writeByteArrayToFile(newFile(AppSeting.UPLOAD_MEMBER_PHOTO_DIR,phoneName),mPhoto.getBytes());
//删除以前的图片
if(Tools.isNotNull(member.getPhoto())){
FileoldImage=newFile(AppSeting.UPLOAD_MEMBER_PHOTO_DIR,member.getPhoto());
if(oldImage.exists()){
oldImage.delete();
}
}
//将头像的文件名称保存的数据库
member.setPhoto(phoneName);
intintR=this.appMemberService.updateMemberById(member);
if(intR>0){
BestLoginmemberVo=this.appMemberService.findMemberById(memberId);
jsonReturn.setCode(200);
jsonReturn.setText("头像上传成功");
jsonReturn.setData(memberVo);
}else{
jsonReturn.setCode(300);
jsonReturn.setText("头像上传失败,稍后再试");
}
}catch(IOExceptione){
e.printStackTrace();
jsonReturn.setCode(300);
jsonReturn.setText("头像上传失败,稍后再试");
}
}else{
jsonReturn.setCode(500);
jsonReturn.setText("参数异常");
}
}else{
jsonReturn.setCode(500);
jsonReturn.setText("参数异常");
}
}else{
jsonReturn.setCode(500);
jsonReturn.setText("上传的头像为空");
}
returngson.toJson(jsonReturn);
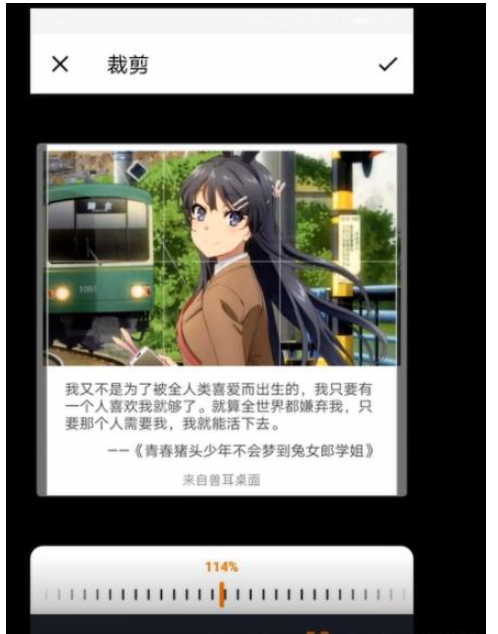
}6、效果图:
效果二:

读到这里,这篇“Android如何实现图片裁剪和上传”文章已经介绍完毕,想要掌握这篇文章的知识点还需要大家自己动手实践使用过才能领会,如果想了解更多相关内容的文章,欢迎关注亿速云行业资讯频道。
Android如何实现图片裁剪和上传的详细内容,希望对您有所帮助,信息来源于网络。