Java 添加、更新和移除PDF超链接的实现方法
导读:本文共4440字符,通常情况下阅读需要15分钟。同时您也可以点击右侧朗读,来听本文内容。按键盘←(左) →(右) 方向键可以翻页。
摘要:简介PDF超链接用一个简单的链接包含了大量的信息,满足了人们在不占用太多空间的情况下渲染外部信息的需求。下面将介绍通过Java 在PDF中添加、更新和移除超链接。(一)工具使用:• Free Spire.PDF for Java 2.4.4(免费版)• Intellij IDEA(二)导入Jar文件包:• 方式一:首先,从官网获取Free Spire... ...
目录
(为您整理了一些要点),点击可以直达。简介
PDF超链接用一个简单的链接包含了大量的信息,满足了人们在不占用太多空间的情况下渲染外部信息的需求。下面将介绍通过Java 在PDF中添加、更新和移除超链接。
(一)工具使用:
• Free Spire.PDF for Java 2.4.4(免费版)
• Intellij IDEA
(二)导入Jar文件包:
• 方式一:首先,从官网获取Free Spire.PDF for Java文件包。
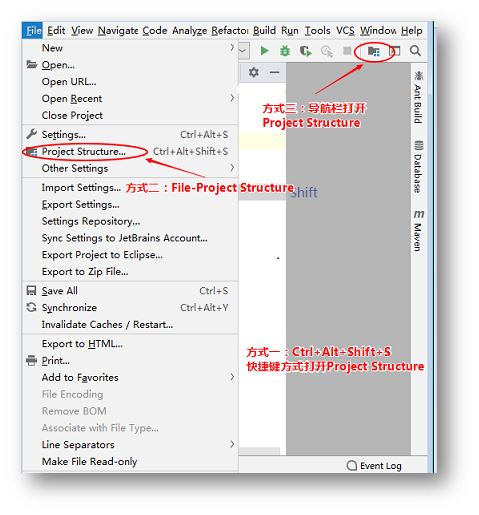
Step 1: 下载控件包之后解压,打开“Project Structure”界面。(以下是三种在IDEA中快速打开Project Structure界面的方式,可选其中任意一种)
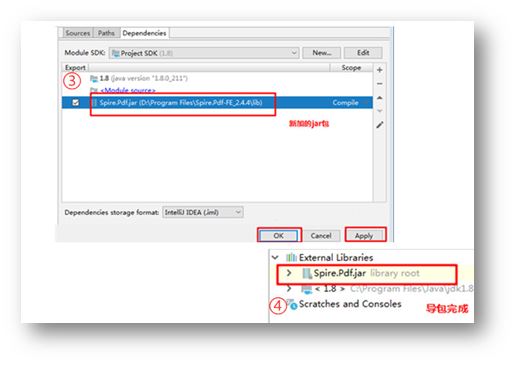
Step 2:按以下操作步骤进行导入。① 选择“Modules”—“Dependencies”,添加外置jar包;② 进入"Attach File or Directories"界面选择jar文件路径,然后点击“OK”;③ 勾选jar路径选项,点击”OK”/”Apply”;④ 导入完成。如下图:

• 方式二:使用Maven配置导包。可以参考导入方法。
Java代码示例参考
(一) 添加超链接到PDF
添加命名空间:
import com.spire.pdf.*;import com.spire.pdf.annotations.*;import com.spire.pdf.graphics.*;import java.awt.*;import java.awt.font.TextAttribute;import java.awt.geom.*;import java.util.HashMap;
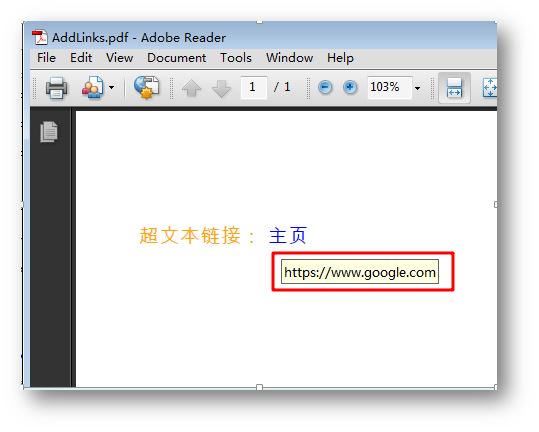
1. 添加超文本连接
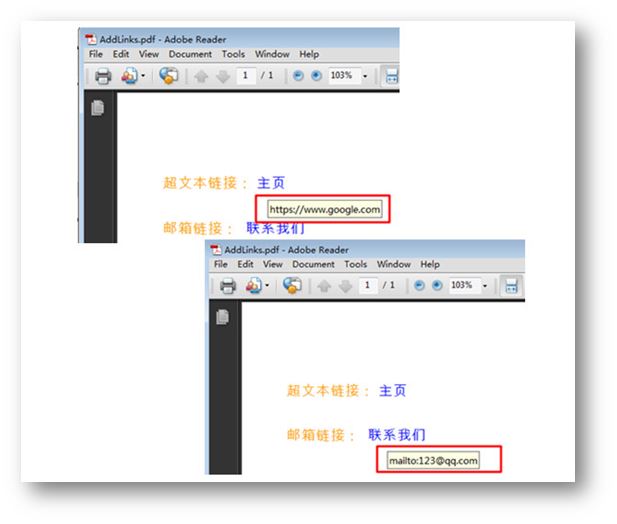
public class TextLink { public static void main(String[] args) throws Exception{ //创建PDF文档 PdfDocument doc = new PdfDocument(); PdfPageBase page = doc.getPages().add(); //初始化X,Y坐标 float y = 30; float x = 0; // 创建一个普通字体 PdfTrueTypeFont plainFont = new PdfTrueTypeFont(new Font("Arial Unicode MS",Font.PLAIN,13),true); //创建一个带下划线的字体 HashMap<TextAttribute, Object> hm = new HashMap<TextAttribute, Object>(); hm.put(TextAttribute.UNDERLINE, TextAttribute.UNDERLINE_ON); hm.put(TextAttribute.SIZE, 13); hm.put(TextAttribute.FAMILY, "Arial"); Font font = new Font(hm); PdfTrueTypeFont underlineFont = new PdfTrueTypeFont(font,true); //添加超文本链接到PDF String label= "超文本链接: "; PdfStringFormat format = new PdfStringFormat(); format.setMeasureTrailingSpaces(true); page.getCanvas().drawString(label, plainFont, PdfBrushes.getOrange(), 0, y, format); x = (float)plainFont.measureString(label,format).getWidth(); //创建PdfTextWebLink对象 PdfTextWebLink webLink = new PdfTextWebLink(); //设置超链接文本 webLink.setText("主页"); //设置超链接地址 webLink.setUrl("https://www.google.com"); //设置超链接字体和字体颜色 webLink.setFont(plainFont); webLink.setBrush(PdfBrushes.getBlue()); //添加超链接到页面 webLink.drawTextWebLink(page.getCanvas(), new Point2D.Float(x, y)); y= y +40; //保存文档 doc.saveToFile("AddLinks.pdf"); doc.close(); }}添加结果:
2. 添加邮箱链接
public class EMailLink { public static void main(String[] args) throws Exception{ //创建PDF文档 PdfDocument doc = new PdfDocument(); PdfPageBase page = doc.getPages().add(); //初始化X,Y坐标 float y = 30; float x = 0; // 创建一个普通字体 PdfTrueTypeFont plainFont = new PdfTrueTypeFont(new Font("Arial Unicode MS",Font.PLAIN,13),true); //创建一个带下划线的字体 HashMap<TextAttribute, Object> hm = new HashMap<TextAttribute, Object>(); hm.put(TextAttribute.UNDERLINE, TextAttribute.UNDERLINE_ON); hm.put(TextAttribute.SIZE, 13); hm.put(TextAttribute.FAMILY, "Arial"); Font font = new Font(hm); PdfTrueTypeFont underlineFont = new PdfTrueTypeFont(font,true); //添加邮箱链接 String label = "邮箱链接: "; PdfStringFormat format = new PdfStringFormat(); format.setMeasureTrailingSpaces(true); page.getCanvas().drawString(label, plainFont, PdfBrushes.getOrange(), 0, y, format); x = (float)plainFont.measureString(label, format).getWidth(); //创建PdfTextWebLink对象 PdfTextWebLink webLink = new PdfTextWebLink(); webLink = new PdfTextWebLink(); //设置超链接文本 webLink.setText("联系我们"); //设置超链接地址 webLink.setUrl("mailto:123@qq.com"); //设置超链接字体和字体颜色 webLink.setFont(plainFont); webLink.setBrush(PdfBrushes.getBlue()); //添加超链接到页面 webLink.drawTextWebLink(page.getCanvas(), new Point2D.Float(x, y)); y = y + 40; //保存文档 doc.saveToFile("AddLinks.pdf"); doc.close(); }}添加结果:

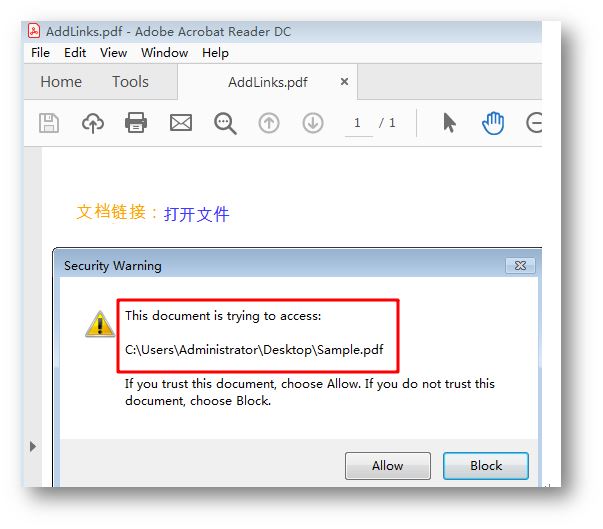
3. 添加文档链接
public class FileLink { public static void main(String[] args) throws Exception{ //创建PDF文档 PdfDocument doc = new PdfDocument(); PdfPageBase page = doc.getPages().add(); //初始化X,Y坐标 float y = 30; float x = 0; // 创建一个普通字体 PdfTrueTypeFont plainFont = new PdfTrueTypeFont(new Font("Arial Unicode MS",Font.PLAIN,13),true); //创建一个带下划线的字体 HashMap<TextAttribute, Object> hm = new HashMap<TextAttribute, Object>(); hm.put(TextAttribute.UNDERLINE, TextAttribute.UNDERLINE_ON); hm.put(TextAttribute.SIZE, 13); hm.put(TextAttribute.FAMILY, "Arial"); Font font = new Font(hm); PdfTrueTypeFont underlineFont = new PdfTrueTypeFont(font,true); //添加文档链接到PDF String label = "文档超链接: "; PdfStringFormat format = new PdfStringFormat(); format.setMeasureTrailingSpaces(true); page.getCanvas().drawString(label, plainFont, PdfBrushes.getOrange(), 0, y, format); x = (float)plainFont.measureString(label, format).getWidth(); page.getCanvas().drawString("打开文件", plainFont, PdfBrushes.getBlue(), x, y, format); Rectangle2D rect = new Rectangle2D.Float(x,y+10,60,15); //创建一个文件超链接对象并加载文件 PdfFileLinkAnnotation fileLinkAnnotation = new PdfFileLinkAnnotation(rect,"C:\\Users\\Administrator\\Desktop\\Sample.pdf"); fileLinkAnnotation.setBorder(new PdfAnnotationBorder(0f)); //添加文件到超链接 ((PdfNewPage) ((page instanceof PdfNewPage) ? page : null)).getAnnotations().add(fileLinkAnnotation); //保存文档 doc.saveToFile("AddLinks.pdf"); doc.close(); }}添加结果:
(二) 更新和移除超链接
测试文档:
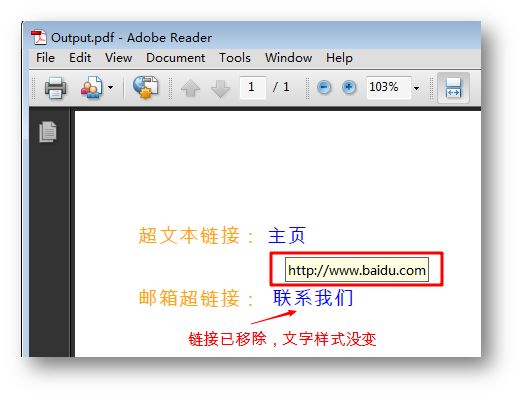
使用PDFAnnotatioCollection 类和PdfTextWebLinkAnnotationWidget类创建超链注释集合并获取到第一个超链接,使用getUrl ()方法设置超链接地址,removeAt()方法移除超链接。
import com.spire.pdf.PdfDocument;import com.spire.pdf.PdfPageBase;import com.spire.pdf.annotations.PdfAnnotationCollection;import com.spire.pdf.annotations.PdfTextWebLinkAnnotationWidget;public class UpdateDelLinks { public static void main(String[] args) throws Exception { //创建PDF文档 PdfDocument doc = new PdfDocument(); //加载PDF源文件 doc.loadFromFile("data/AddLinks.pdf"); //获取文档第一页 PdfPageBase page = doc.getPages().get(0); //获取第一页超链接注释的集合 PdfAnnotationCollection annotationCollection = page.getAnnotationsWidget(); //获取第一个超链接 PdfTextWebLinkAnnotationWidget uriAnnotationWidget = (PdfTextWebLinkAnnotationWidget) annotationCollection.get(0); //设置超链接 uriAnnotationWidget.setUrl("www.baidu.com"); //removeAt()方法移除第二条超链接 annotationCollection.removeAt(1); //保存文件 doc.saveToFile("Output.pdf"); }}更新移除结果:
Java 添加、更新和移除PDF超链接的实现方法的详细内容,希望对您有所帮助,信息来源于网络。